HOW TO REPAIR ALL TYPES OF NATURAL STONE
MARBLE | GRANITE | LIMESTONE | SLATE
To repair natural stone you must first identify the type of stone that you have. The most common types of natural stone I encounter are, Marble, Granite, Limestone and Slate. Besides these, I also repair items made of Sandstone and Onyx, but not as often.
There are many articles written on how to identify different types of natural stone. Most of them are very well-researched, well written and interesting. Most people in the industry understand them, and some like myself may have studied geology. For the layperson trying to identify their piece of stone, these articles can be confusing as they offer too much information. What difference will understanding the difference between Siliceous and Calcareous stones or Igneous and Sedimentary rocks going to be a real help to them? Very little I think!
HOW TO IDENTIFY A PIECE OF NATURAL STONE
There are several choices for the layperson to identify a piece of natural stone. If you have a sample piece of the stone or a piece of the damaged stone. To start you can take it along to a local stone masons yard. In most cases, they are happy to help you. In addition to this take some photos of the item or area to show them. If the damaged piece is a floor tile, or from a limestone fireplace or a chip from a granite countertop. Visiting a local company specializing in those products is a good start.
High-quality images of natural stones online have never been better. You can start by looking at the websites of companies that supply natural stone. As before you can try the websites of fireplace companies, kitchen companies, or tiles shops etc. If you are unable to identify your piece of stone from the images on those websites. You can email them a photo of it and follow it up with a phone call.
A simple online search for natural stone images can also help you to identify your stone. A search for green marble, white granite or purple slate will give you hundreds of images. The links within the images will take you to the suppliers.
THE NAMES OF NATURAL STONES
A word of caution with the names of natural stone. The naming of a particular colour of marble or granite will start with the owner of the original quarry. The wholesalers will then give it another name, normally a variation of the name used by the quarry. Individual suppliers, be they kitchen companies, fireplace companies or tile shops etc. Most
When identifying your stone go by what you see. Do not be swayed by the name given to the stone.
DIFFERENT TYPES OF FINISH
Once you have identified the type of natural stone, next you must consider the finish. For example, Marble and Granite, are both supplied with a polished or matt finish. It is easier to repair a matt finish stone than one with a polished finish. The process and some materials are also slightly different.
A good example of this is repairing a piece of black granite. To repair a piece of honed granite you would use a black resin filler. Once it has set, sand it down to blend it in with the rest of the stone. To repair a polished granite it is better to use a clear resin and add a black pigment to it. When it has set, remove the excess with a knife blade as opposed to sanding down.
DIFFERENT TYPES OF REPAIR
Depending on the damage there are different ways to repair natural stone. Where the damage is such that a piece of the stone is missing. The damaged area has to be squared off before knitting in a piece of matching stone. (Read More On This Type Of Repair). If it is a small chip, then a resin repair is best. Deep scratches that cannot be sanded down can be repaired with a water clear resin. It is also possible to repair cracks with this type of resin. However, it will take 24 hours for the water clear resin to set.
WHAT TO EXPECT FROM A REPAIR
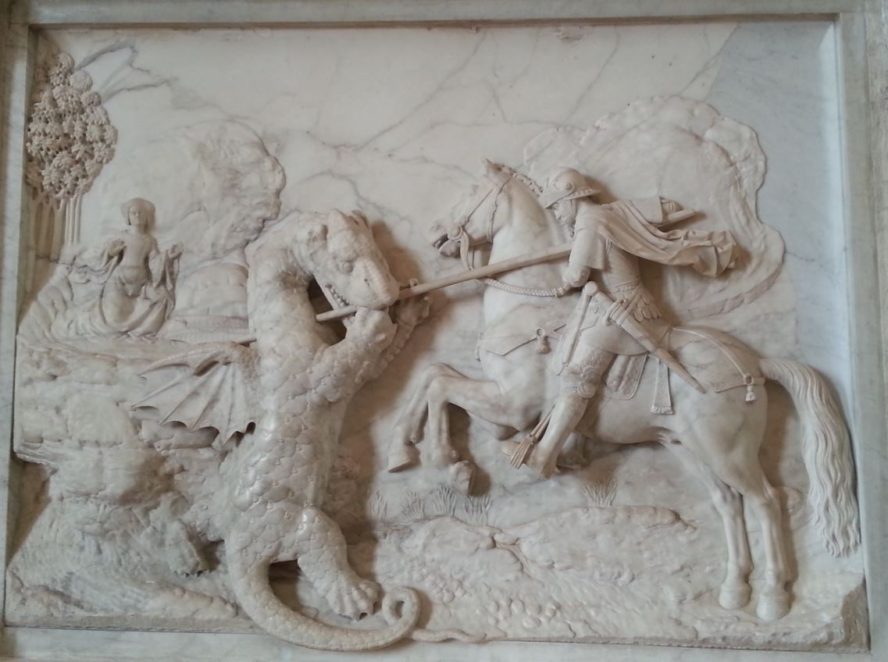
You should first decide what you want from a repair. In the case of damaged stairs or a cracked floor tile, safety will be your first concern. Obtaining a perfect match of any natural stone really does depend on the age of the original stone. The older the stone the more likely the colour will have changed as the stone is quarried. The image above is a good example, the photo was taken in The Louvre. This section of a Carrera Marble carving was repaired hundreds of years later. The stonemason used a piece of marble from the original quarry.
It is possible to achieve near perfection with a resin repair. However, the deciding factors for this to happen are the size of the damage. The part or position in the stone that is damaged. Finally the lighting in the area where the damage is.
EXAMPLES OF NATURAL STONE REPAIRS
Below are several examples of natural stone repairs. Each one gives a brief outline of the process and the materials used in the repair. Some examples have a link to a longer article where I think a more detailed breakdown will help you. Select the link to go straight to the type of repair you would like to read about.
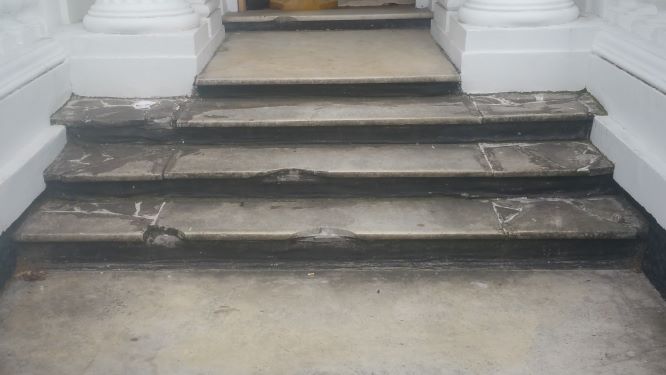
CARRERA MARBLE STAIRS
The marble entrance stairs to this property in West London had several problems. The nosing of the marble steps and threshold were chipped. There were missing pieces of marble. The chip on the threshold had to be matched with an old and stained piece of marble. Together with this, I had to match the level of yellow staining in the original marble.
Before any works could be done the stairs had to be cleaned. Once the marble was cleaned, a good colour match could be found.

CLICK HERE TO READ THE FULL ARTICLE ABOUT THIS REPAIR
HOW TO REPAIR TRAVERTINE
Here are three examples of how to repair travertine. A large chip repaired with a small piece of travertine. A long crack repaired with a resin filler, and a large hole also repaired with a resin filler. Finally, some advice on filling small holes in travertine.
1. A DAMAGED TRAVERTINE STEP
This Travertine step was damaged during a delivery to an office building in Central London. A common problem. Travertine comes in many different colours and different shades within each colour. You must first clean the stone as best as you can. Once clean you can then match the colour of the travertine. When you have the best possible colour match of your travertine, you can then try to match the veining.
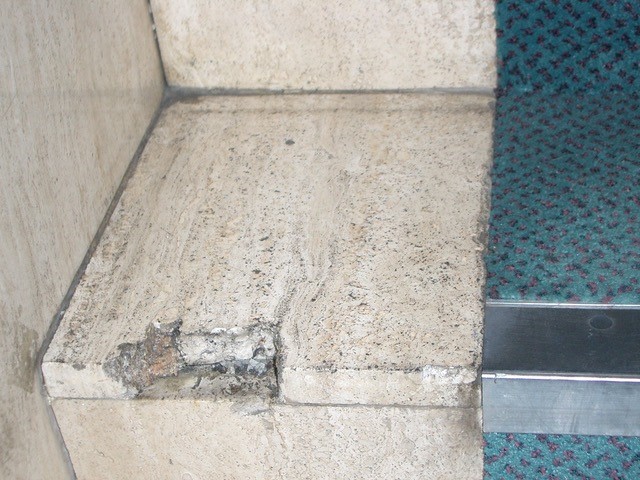
The damaged part of the travertine is cut away, a small piece is cut to fit into the space. The piece should be cut to match the veining in the Travertine step.
Repairs like this can be repaired with the same resin adhesive used to fill the holes in travertine. The basic buff colour resin is a good match for this piece. If needed you can add pigments to the resin for a closer colour match.
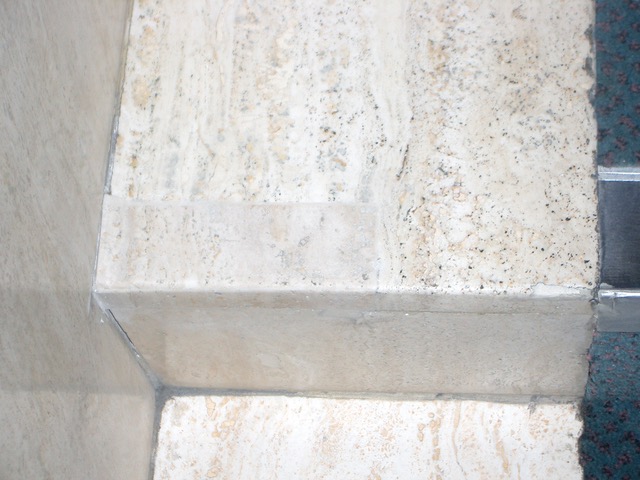
The excess resin is removed. Finally, to give the repair a nice clean look the rest of the nosing is sanded back.
2. A CRACKED TRAVERTINE FLOOR TILE
To repair a crack in travertine, thoroughly clean the stone before you start the repair. The last thing you want to see is dirty lines on either side of your repair. Leaving it dirty will always draw your eyes to a repair that should be invisible.
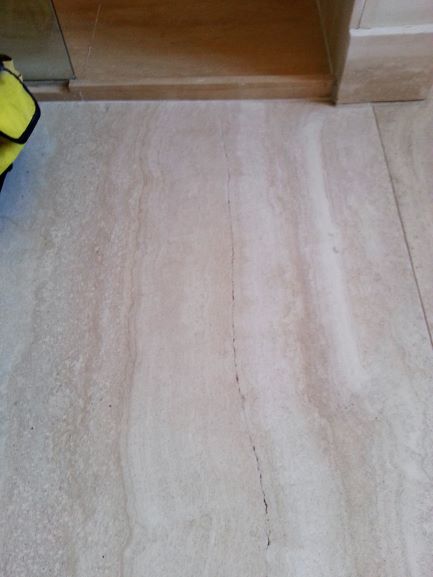
Most cracks in travertine happen along the vein which makes them easy to repair and hide. I use a buff coloured resin filler and mix about 3 or 4 batches; each one is a slightly different shade.
Aside from the original buff colour of the resin. Two further batches are mixed, one with a brown pigment added the other with a white pigment. Depending on the colour of the stone sometimes a fourth is needed. To achieve this vary the amount of pigment in either of the batches you have mixed.
Applying the resin; Mix each batch separately with the hardener and apply each one intermittently along the crack. This will break up the colours and look more natural. Depending on the finish of your travertine, if polished scrape off the excess filler with a knife blade. If the stone has a honed finish remove the excess with a 120-grit abrasive. For a finer finish continue sanding with a 220 or 320 grit abrasive. The best abrasive disks for Natural stone is Silicone Carbide.
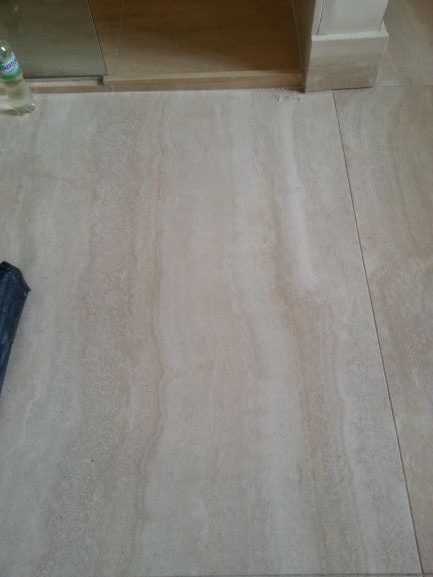
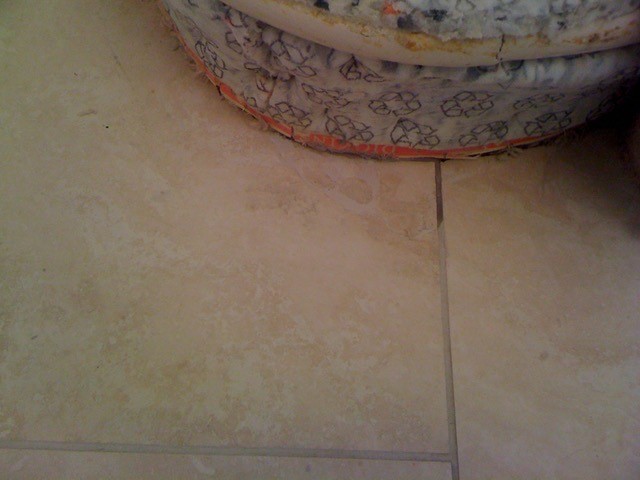
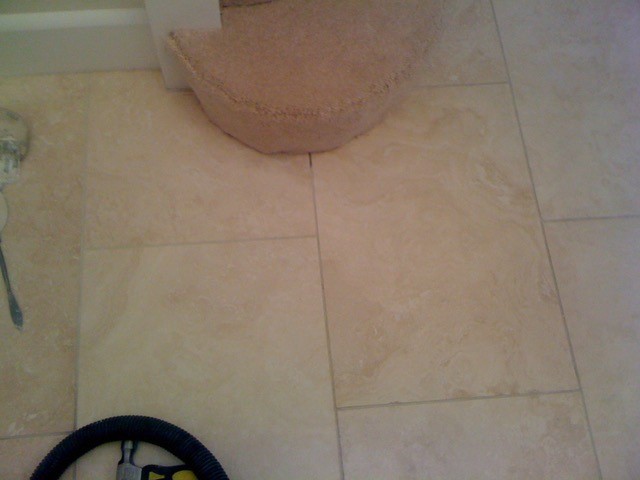
3. A LARGE HOLE IN A TRAVERTINE FLOOR TILE
This cross cut travertine floor tile was damaged by a carpet fitter. I needed three different shades of filler to match the colours and pattern of the travertine floor tile. When matching these colours I used a pigment called Ocra, this gives the resin a yellowish/brown tint.
I mixed them with the hardener separately. Each colour was added intermittently in various shapes to form a pattern. Once the filler had set, I sanded them down which helped to blend them in further. Finally, I polished the travertine to match the rest of the floor area.
SOME ADVICE ON FILLING HOLES IN TRAVERTINE
The process is the same for filling small individual holes in travertine but just one shade will do. The larger the hole the more shades are required to give it a more natural look. If you have a lot of small holes spread across a large floor area one shade will do. To avoid waste, mix your filler and hardener in very small batches.
To remove the excess filler, I find it is best to use a scrapper with a new knife blade fitted. Try to avoid sanding down the individual repairs it will leave light patches on the floor. The whole floor will have to be cleaned afterwards if you do so. Remember always clean the damaged area first and work in small areas until complete. Spread the project over 2 or 3 days to make it easier for yourself. Finally, clean your tools regularly throughout the project to achieve better results.
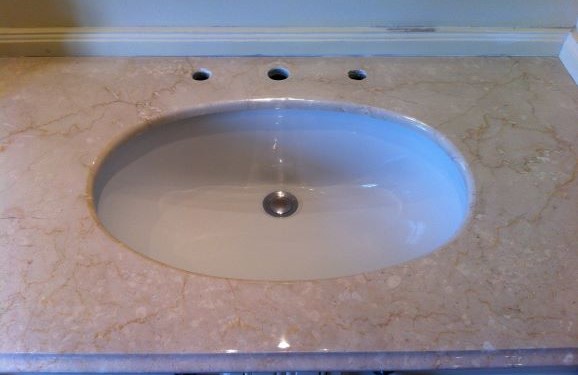
BOTTICINO MARBLE VANITY TOP
The image below is of a Botticino Marble vanity top it had two main problems. Limescale damage and the use of the wrong cleaning products. Unfortunately, the limescale had eaten into the marble around the taps and the marble was breaking away. The pitting was as deep as 4mm in some places where the limescale had damaged the stone.
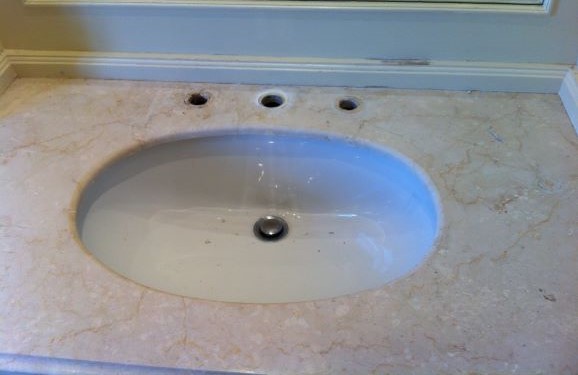
The surface of the other parts of the marble vanity top was badly scratched but these were not deep scratches. The use of the wrong cleaning products left the appearance of the marble looking very dull and flat.
REPAIRING THE DAMAGED AREA AROUND THE TAPS
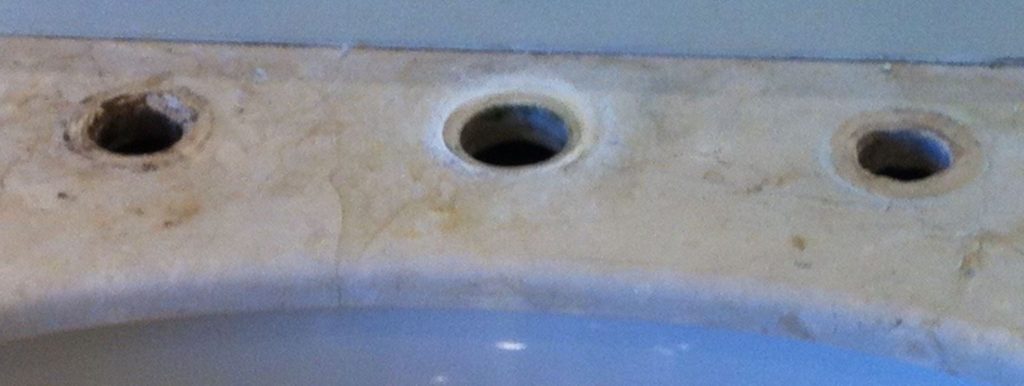
The area around the taps could not be sanded back as it would leave a dip in the stone. When the new taps are fitted water would collect around the taps and limescale would form again.
The area around the taps is cleaned. Afterwards, the damage is repaired with a resin to match the colour of the marble. Once the resin had set and hardened the marble was then restored using diamond polishing pads.
To restore the colour and shine to the marble I used a marble polishing compound and finally Lithofin MN Polish.
BLACK GRANITE CLADDING
The damage to this piece of granite was close to the goods entrance of a commercial property. It may have been caused by a vehicle or it had been vandalised. The client did not want to remove the piece of granite at the time but just wanted a cosmetic repair. They would later match and replace the piece of granite.
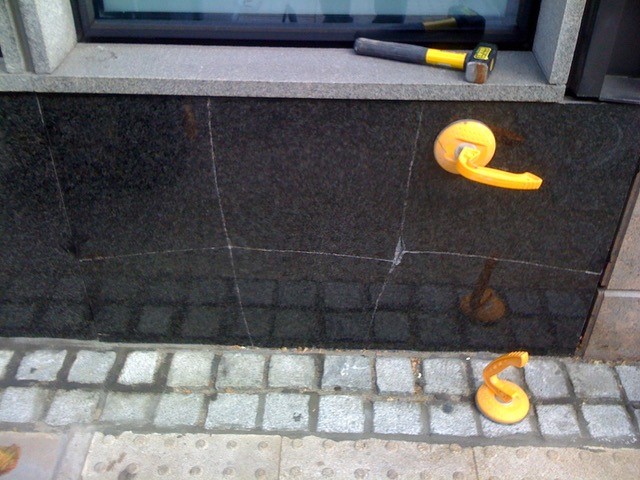
I used some suction pads to pull out the granite and straighten it as best as possible. Some wedges were inserted into the joints and under the window sill to help hold the granite in place. There was one large chip to repair in the middle, also some pieces of granite had flaked away. To match the granite colour I used a transparent resin and added a black pigment to it.
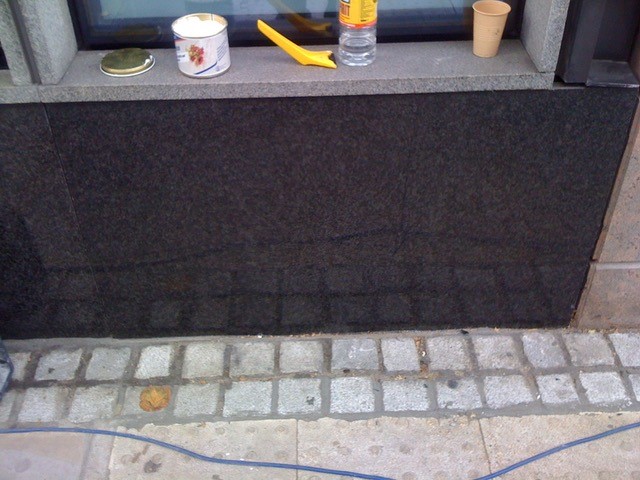
The excess resin could not be sanded off as this would affect the original polished finish of the granite. I removed the excess with a knife blade. Finally, the surface was polished with Lithofin MN Polish.
CARRERA MARBLE FIREPLACE
This marble fireplace was damaged by the contractors during refurbishment works in a North London property. The damage was made worse when the contractors tried to repair it themselves.
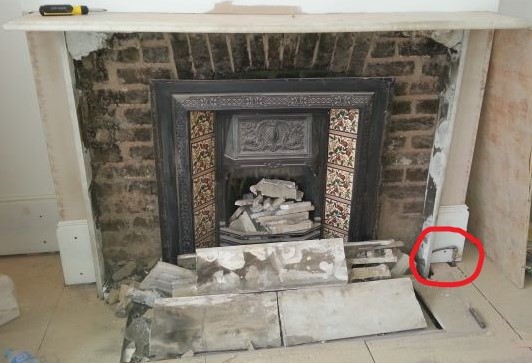
The pieces of marble had to be carefully separated cleaned and repaired. Some of the pieces were kept together to help when fitting the fireplace back into its original position. New fixing blocks of marble were made. The original fitters used pieces of brick and large blobs of adhesive.
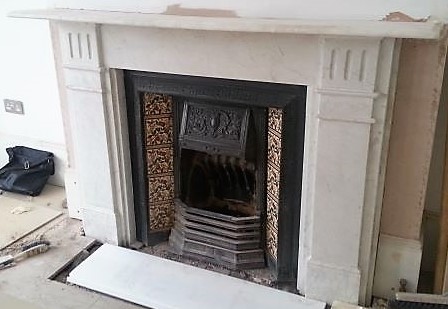
The opening of the fireplace was already fixed in place, so the marble had to be fitted around it.
CLICK HERE TO READ ABOUT MORE FIREPLACE REPAIRS
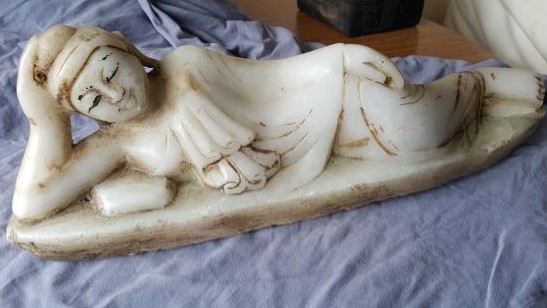
A MARBLE ORNAMENT
There were 2 challenges when repairing this marble ornament. The damage occurred when it was dropped while moving to a different location within a property in West London. The first challenge was repairing so that you could not see the break line in the marble. The second was that the client did not want the weathered look of the piece to change.
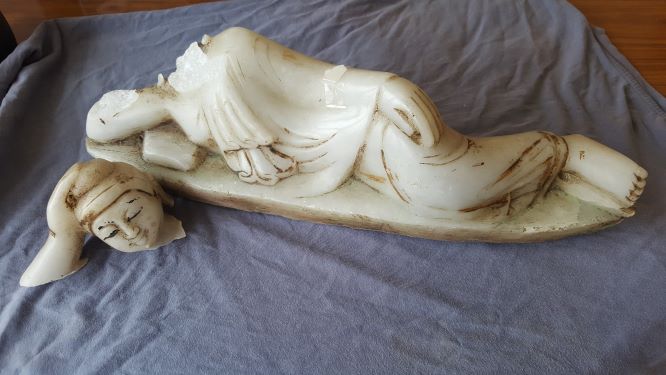
To repair this piece of marble. I had to mill out the middle of the stone without touching the outer edges of the marble. A white resin adhesive was used in the middle with a water clear resin on the outer edges. The excess adhesive could not be sanded off as it would affect the finish. I removed the excess just before it had fully set with a knife blade.
READ A MORE DETAILED ARTICLE ABOUT THIS REPAIR
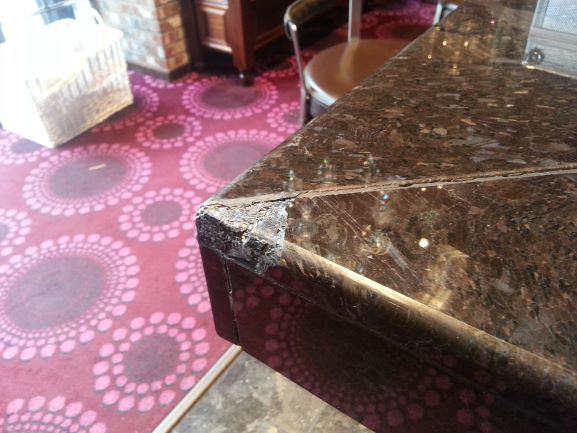
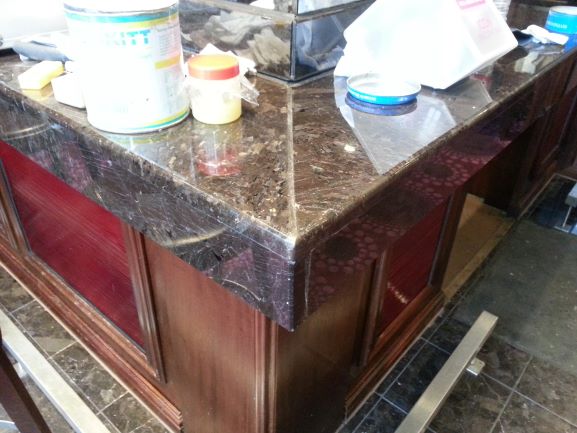
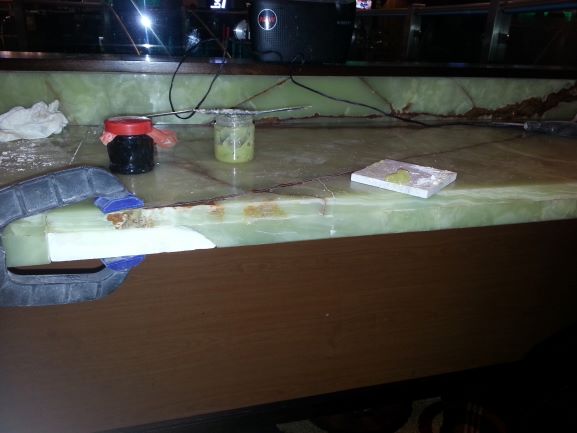
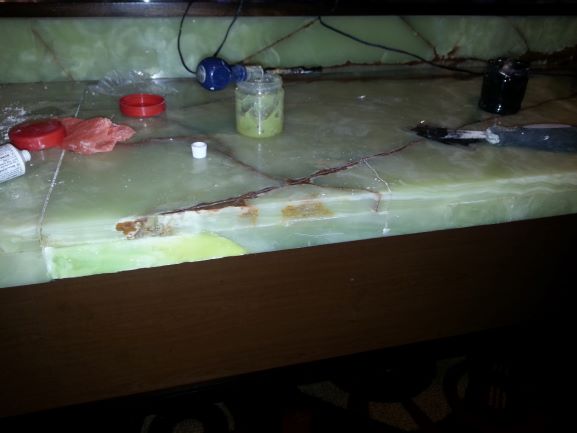
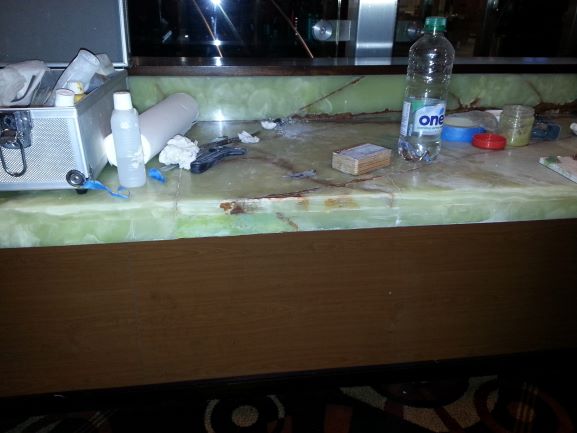
GRANITE BAR TOP
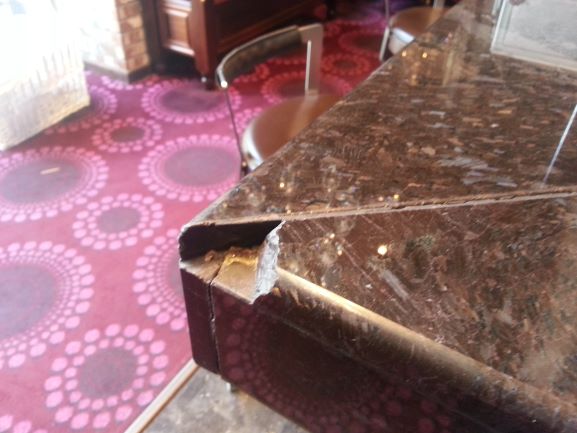
This damaged granite bar top in a London casino had to be repaired with only resin. The original could not be found. A challenge with repairing granite with just resin is not just matching the colours and pattern in the stone. Allowing for changing light conditions is also necessary. The two different materials, granite and resin never look the same as the light changes.
The bulk of the repair is a black resin filler. Once applied it is roughly shaped to match the profile of the bar top. This first layer of resin is 3mm to 4mm short of the surface.
The second and third layers of resin will have the various colours added to match the colour of the granite. I used two resins with pigments added to match the colour and patterns in the granite. I made about three batches of white resin with different shades of brown pigment. These were layered over the black resin. When set the excess was removed so that it was flush with the rest of the granite. The white resin with the pigments does not shine as much as the granite when polished.
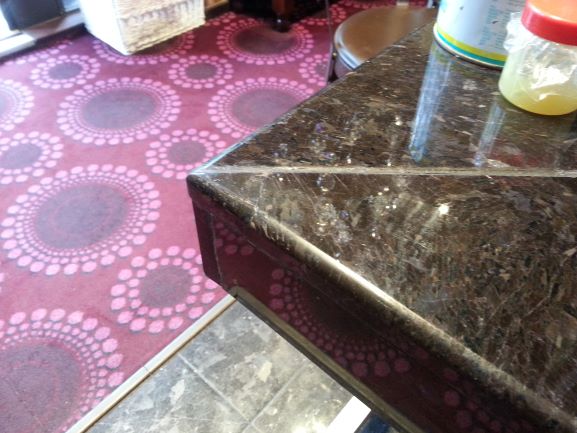
A transparent resin with a very small amount of brown pigment was used to match the vein-like patterns. The transparent resin was added between the white resin and over the tops of some of them. The transparent resin shines more than the white resin.
The resin repair is then shaped and polished to match the profile of the granite bar. The two different resins, with different shades of brown, will then react differently as the lights change.
ONYX TABLE REPAIR
This is how I repair a part of an Onyx table with a piece of marble and a resin adhesive.
The trim around the bottom edge of this Onyx table had broken off and part of it is missing. Onyx is very expensive to buy and there are not many suppliers in London. Matching the missing piece is be very difficult. I decided to repair the damage with a small piece of Arabescato Marble. Together with the marble, I use a clear resin to repair the Onyx.
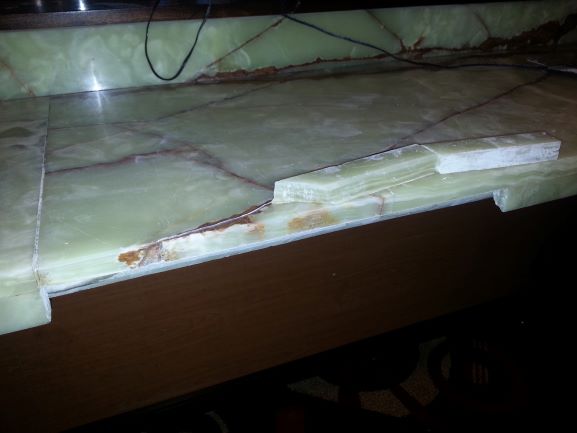
The Arabescato Marble is cut from a 10mm thick floor tile. It is milled down to about 6mm thick and shaped it to match the missing piece of Onyx. The two pieces of the Onyx trim that had been saved were fixed in place using the resin adhesive. The piece of marble is then fixed in place next to them but set back about 4mm from the surface.
I mix six batches of clear resin with different levels of green pigment. Another 4 batches of the resin with different levels of brown pigments to make a vein. When complete the vein will form a seam between the repair and the original Onyx.
The resin is built up over the marble to match the surrounding Onyx. Additionally, I added my brown resins to match the veining on other parts of the table.
Resin repair completed, the new piece is sanded down and polished to match the rest of the onyx.
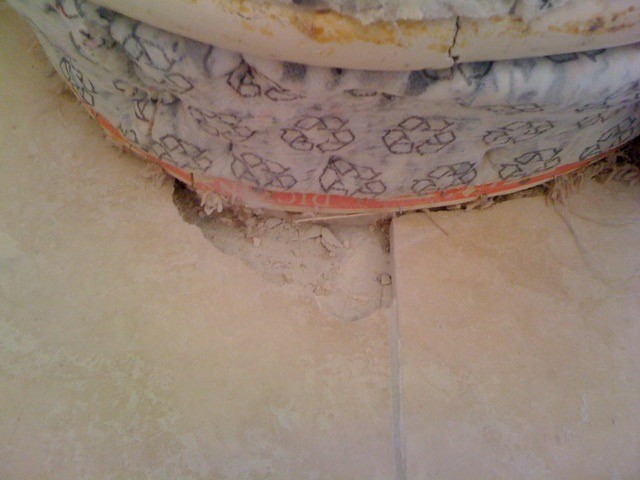
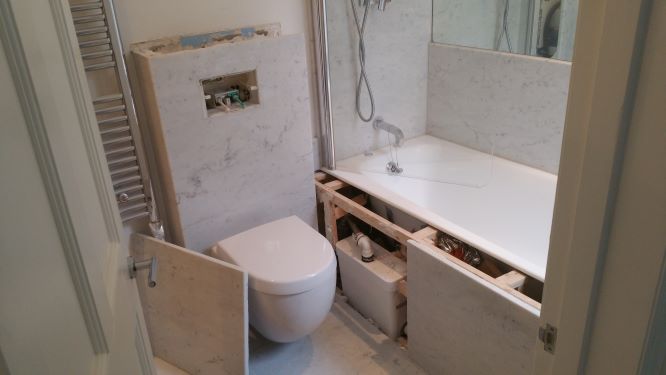
CARRERA MARBLE BATHROOM
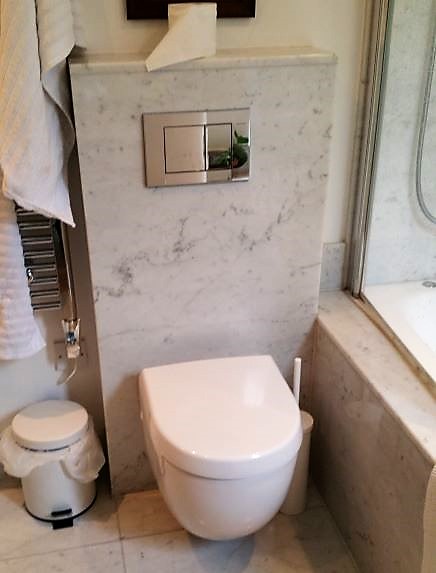
This little project was not so much a repair. However, I was needed to dismantle the marble around the toilet and bath, without damaging the marble. The pump for the macerator in the toilet was faulty and the plumbers needed to gain access to it.
The plumbers were not too sure where the pump was located after the marble around the cistern was removed it was suggested that the pump may be located behind the bath panel. The marble around the top of the bath and the bath panel was carefully removed to reveal the pump for the macerator. The plumbers were then able to easily replace the pump.
To avoid the same problem in the future we decided to make an access panel for the pump to make future serving easier.
I cut a section from the side panel and fitted it to allow easy access to the pump. A bead of silicone both sides of the panel is used to hold it in place. The silicone would just need to be cut get gain access to the pump in the future. A gap at the top of the panel is left to assist with the removal and refitting when necessary.
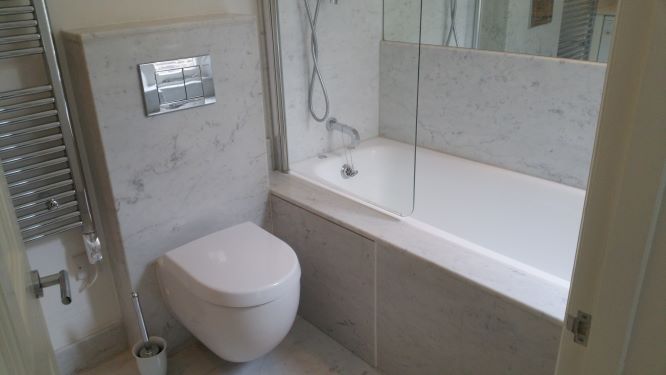
The modified panel together with the piece of marble around the top of the bath is fixed in place. The marble around the top and side of the cistern were fixed back in place. Now the bathroom is back in use without the cost of replacing any of the marble.
HOW TO REPAIR A NATURAL STONE HEARTH
Depending on the damage Natural Stone hearths can be repaired with resin if it is a small chip. If you have the damaged piece, it can be fixed in place with a resin adhesive. These resins can be mixed to match the colour of the stone.
Stone hearths that are broken in two or more pieces can be removed and repaired in a workshop. If a replacement hearth is necessary, they can be removed and replaced. In most cases, it can be replaced without affecting other parts of the fireplace.
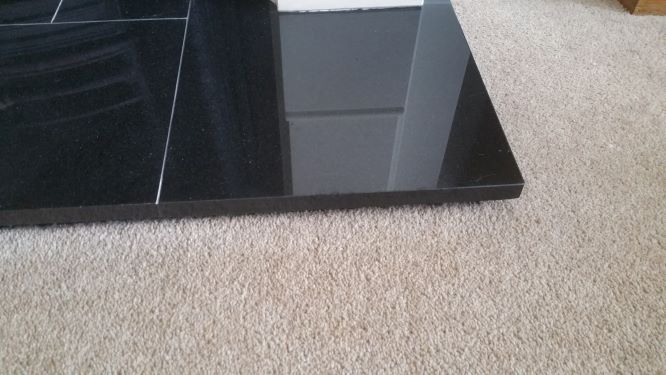
CHIPPED EDGES
The image below is a black granite hearth that was damaged by the outgoing tenant of a rented property. While vacuuming the carpets they chipped the edges of the hearth.
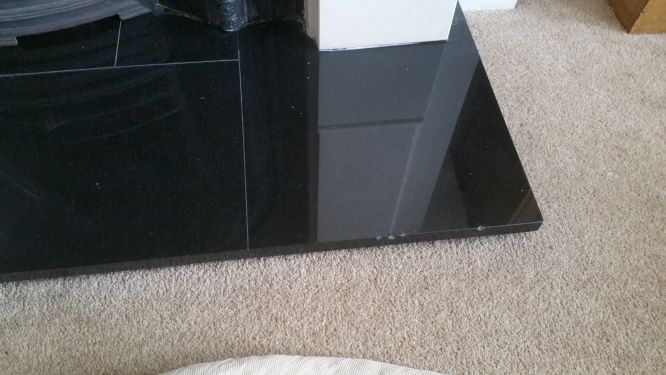
The chips were repaired with a transparent resin filler with a little black pigment added. Once the resin was set the excess was removed with a new knife blade. Finally, it was polished to match the rest of the granite.
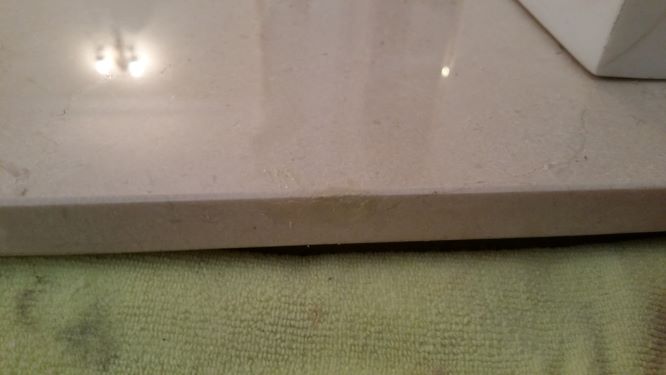
This chip on this Crema Marfil Marble Hearth was caused by some carpet fitters.
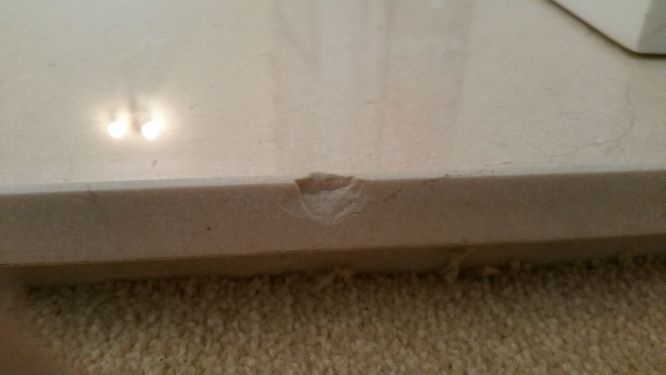
The new carpet is protected while I repair the stone. A buff coloured resin is used with a little white pigment added to it for the repair.
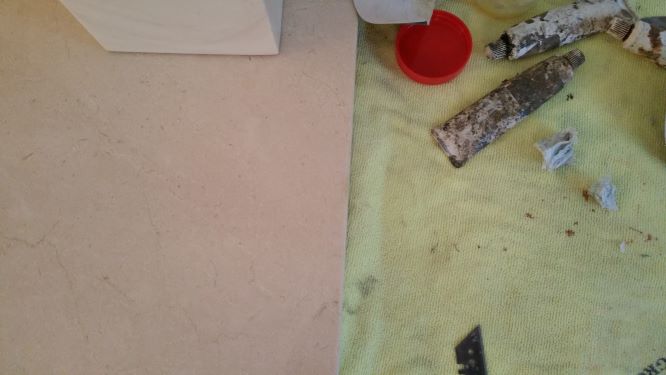
It is not always possible to get a perfect colour match. However, on most marble, it is possible to make it look like part of the pattern or veining.
CRACKED OR BROKEN STONE HEARTHS
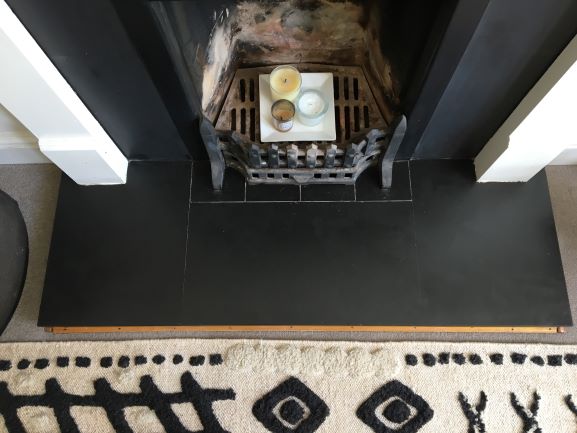
The damage to the black marble hearth below was caused by somebody standing on it. Fortunately, the hearth was not fixed in place with an adhesive or set into the floor. Carefully manoeuvring the marble, I removed the hearth for repair in my workshop.
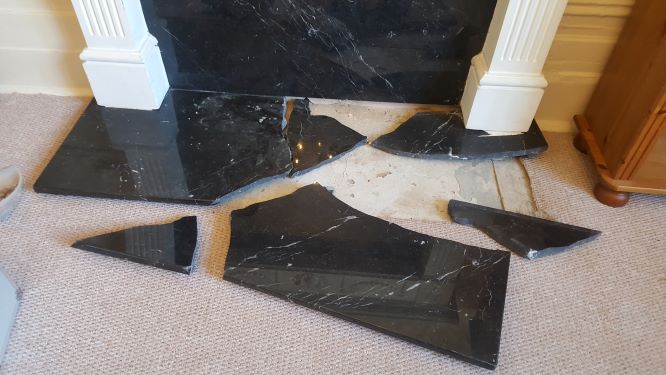
I laid the marble onto a flat surface and glued the individual pieces together. The underside of the hearth was strengthened with 3 pieces of granite across the full width of the hearth.
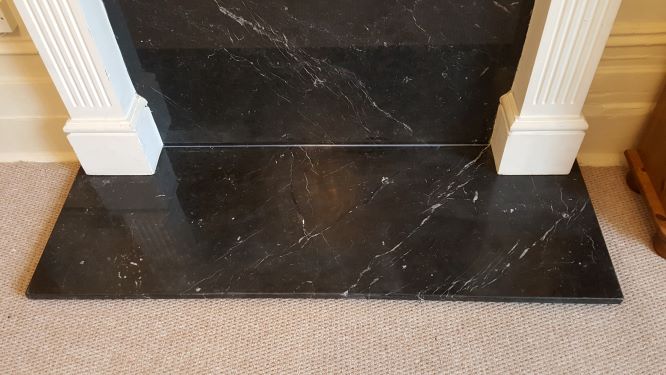
The surface was then sanded and polished to hide the break lines. I made some minor adjustments to the hearth to fit it back in place without causing further damage.
SCRATCHED AND CHIPPED GREY SLATE HEARTH
This slate hearth was damaged by the owners of the property. The large chips were caused while trying to chop some wood on it for the fire. In addition to this, there were some minor scratches were from general use.
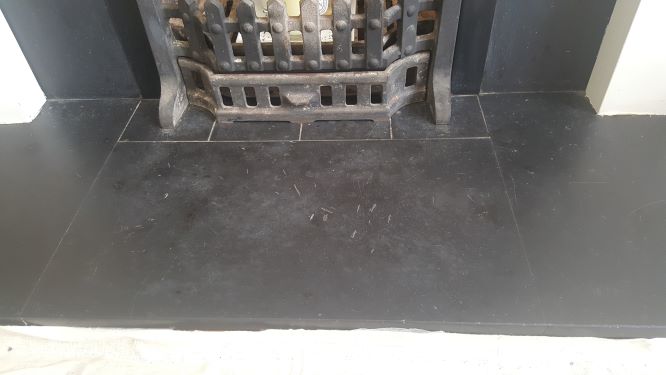
The deep chips in the slate were filled with a black resin adhesive. Once the resin set, I sanded off the excess and removed the lighter scratches at the same time. To remove the scratches, I used a 120-grit abrasive followed by 320 grit for a finer honed finish. All the sanding was done by hand to keep the dust down to a minimum.
I cleaned the slate with a damp cloth. Finally, to finish the repair I sealed hearth with Lithofin Colour Intensifier.
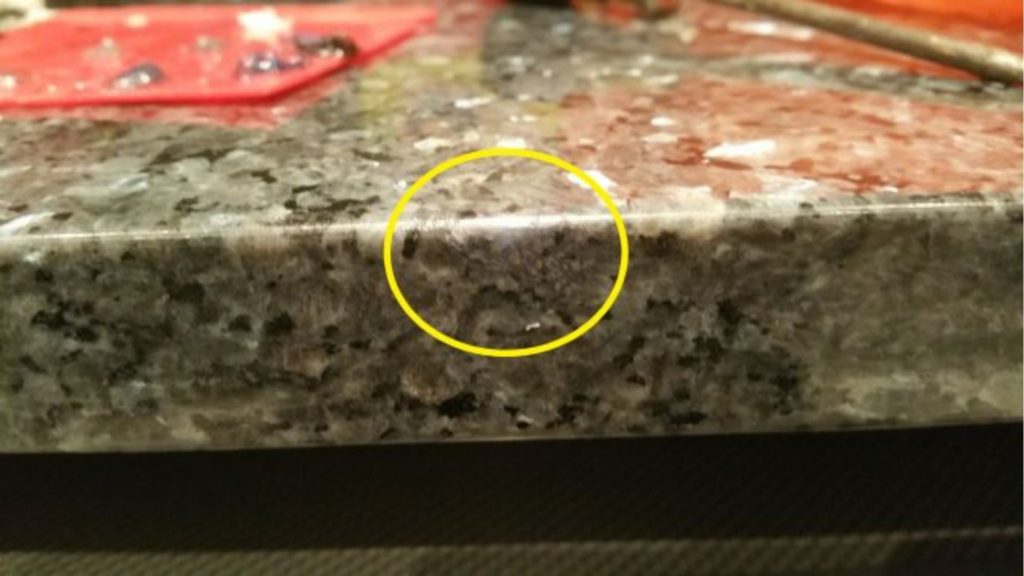
HOW TO REPAIR A CHIP ON A GRANITE COUNTERTOP
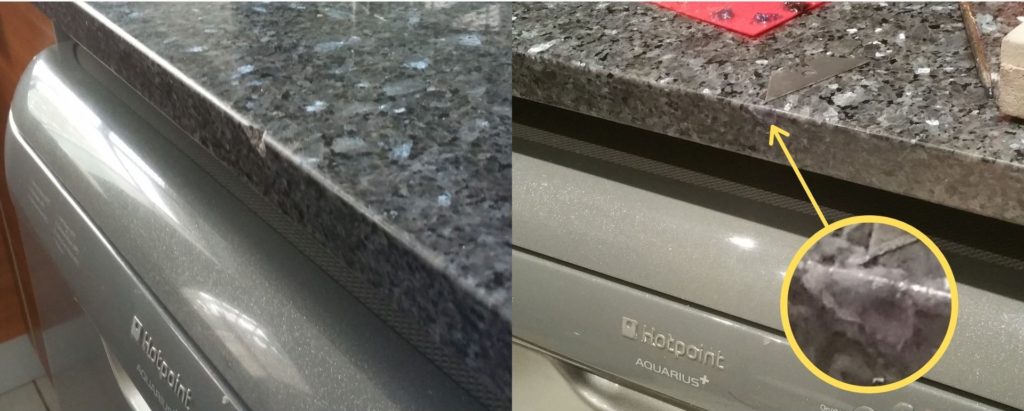
One of the most common natural stone repairs I carryout are chipped edges of granite countertops. Though these repairs are common it is nothing to do with the quality of the granite.
JUST BAD LUCK
In most cases, it is simply bad luck when the granite worktop is hit on the edge with an object. Something as fragile as a teacup can chip granite if caught at a certain angle.
THIS IS HOW I REPAIR A CHIPPED COUNTERTOP WITH AN EPOXY RESIN
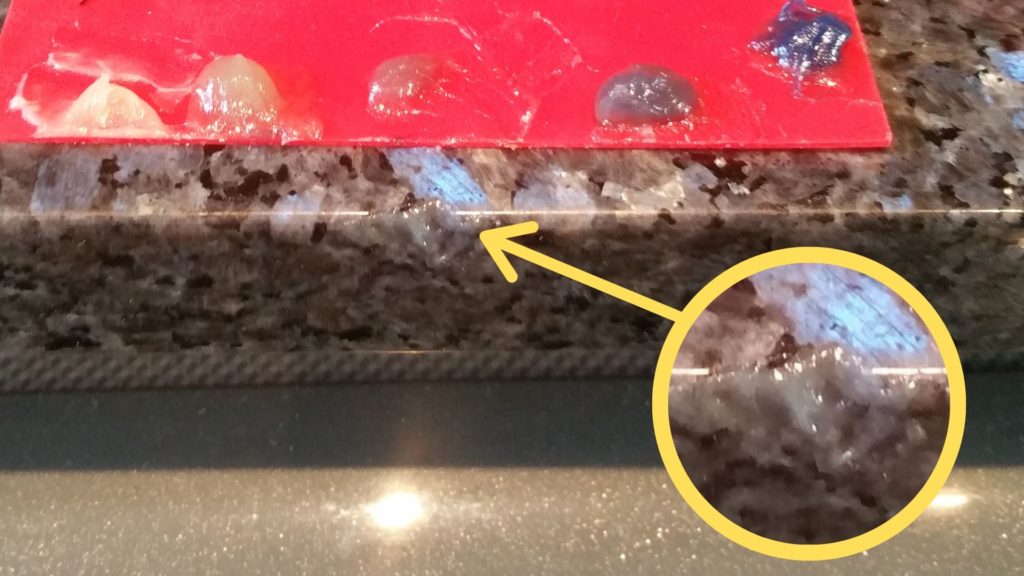
The damaged granite is Blue Pearl, it was chip while loading or unloading the dishwasher below it.
CLEAN THE DAMAGED AREA
First I clean the damaged area. If the chip has been there for a few weeks or months there will be some ingrained dirt in it.
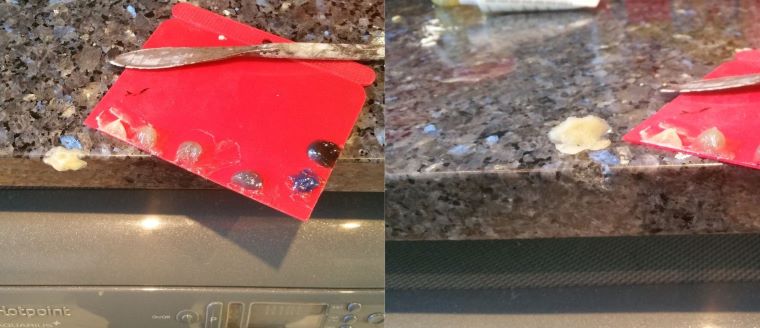
The best way to clean out the damaged area is to use a small amount of the resin. Mix the resin with the hardener and spread a thin layer over the damage and leave it to set. Just as it sets use the edge of a knife blade to remove the resin.
Most of the dirt and any loose material will come away with the resin. A final clean with a little white spirit and the chip is ready for repair.
TRANSPARENT EPOXY RESIN
To repair this piece of Blue Pearl Granite I will use a transparent resin. Once set and the excess removed the transparent resin is easier to polish. The transparent resin takes a little longer to set, so I will have time to adjust the pattern as it sets.
4 DIFFERENT COLOURS
The next thing to do is mix the resin with different colour pigments to match the colours in the granite. Four different colours are mixed to match the various colours in the granite. I basically started with a dark blue mix and mixed lighter versions of it. Because of the mottled effect of the patterns in the granite, the colours do not have to be exact.
APPLYING THE RESIN
One at a time I add the hardener to the resin, then apply the lightest then the darkest resin mix. As they are setting, I use a bradawl tool to poke little holes in the resin. I also use the edge of a knife blade to alter the pattern.
ADDING THE COLOURS
Once the first two colours are set, I remove the excess with a new knife blade. The areas where I poked little holes in the resin as it was setting, I add the other two colours. The other two colours are added intermittently to break up the colours.
REMOVE EXCESS AND POLISH
Finally, once all the resin has set the excess is shaved off with the knife blade. To make it easier to remove the excess I lubricated the blade with a little white spirit. The repair is then sanded with some ultra-fine silicon carbide abrasives, which does not scratch the granite. To complete the repair the granite countertop is polished with a good quality natural stone polish.