How to repair a marble ornament and hide the repair line? Marble can be repaired using a variety of materials. There are repair kits and resin adhesives available e
This article is to illustrate how I repair a small and light decorative piece of marble without pining it. The main points are what tools and materials are needed. Hiding the repair line without affecting the original finish and retaining the weathered look of the ornament. Also, how not to repair it.
QUICK LINKS
The Damage and type of repair
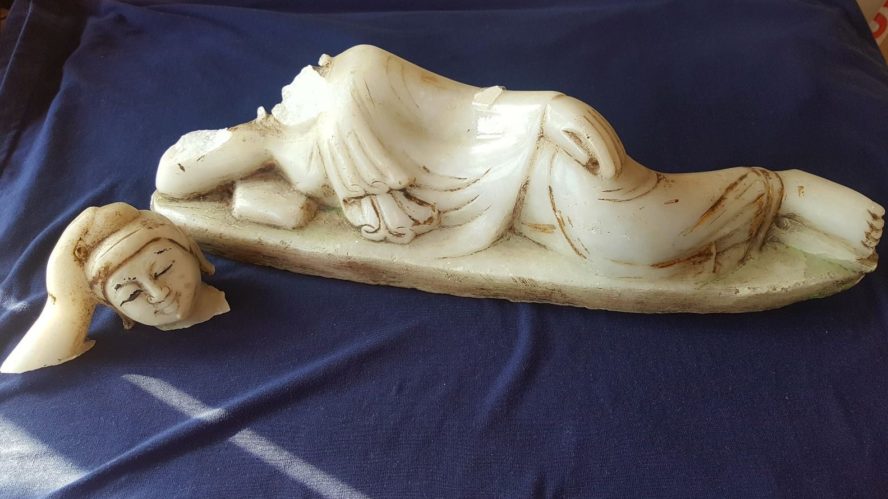
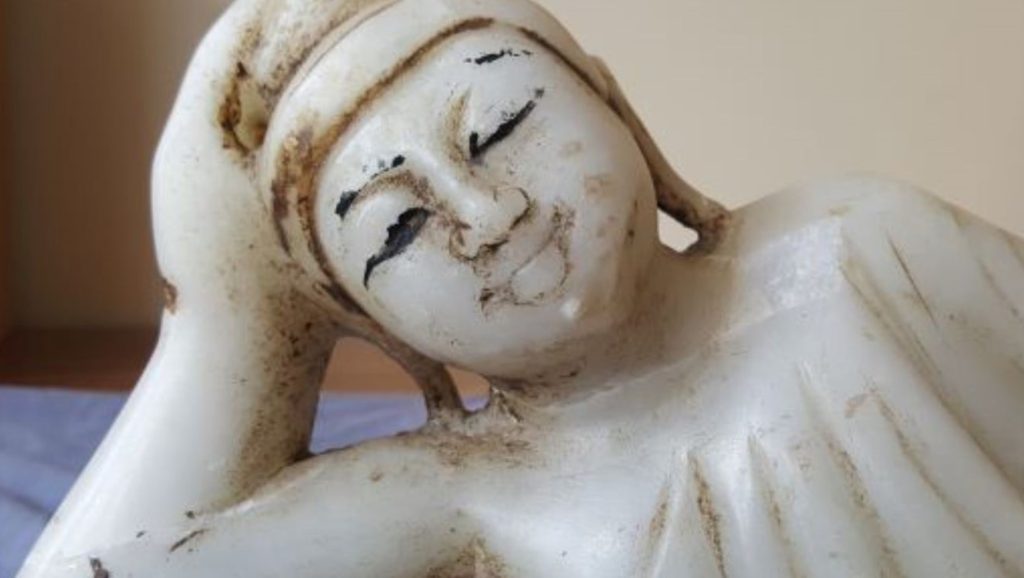
The marble ornament was dropped and landed on its head which broke off. As you can see from the little white spot on its chin that was the point of impact. My client wanted the marble ornament repaired but not cleaned. She wanted to retain the weathered look of the piece. For this repair, I will not use any abrasives to remove the excess adhesive. Even using a very fine grit will clean the stone and affect the overall look. The brake line was slightly fragmented, and there was a larger chip. A small piece of marble chip was recovered and taped to the ornament when I received it for repair.
How not to repair the ornament
You should try to avoid just sticking the two pieces together. If you were to use a small amount of adhesive to avoid seeing the brake line. The repair would be very weak. If you were to use too much adhesive it is difficult to line up the two pieces. There would also be a thick unsightly line of adhesive around the repair.
Some adhesives will darken in time, so do not leave any excess adhesive on the stone. Removing the excess adhesive from the stone with either a white spirit or an abrasive will clean the damaged area. The repair would stand out and you would have to clean the whole piece.
This is my method for repairing the marble ornament
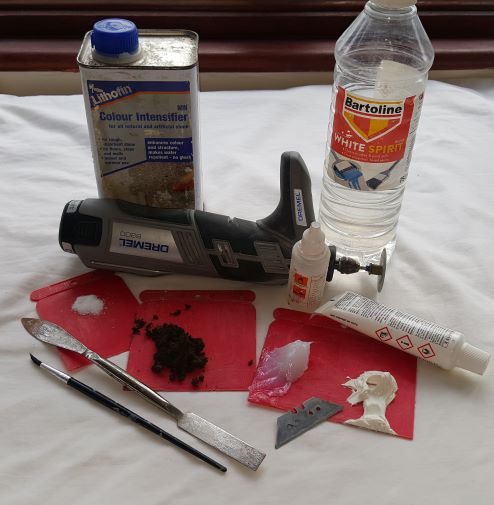
Tools and materials used
Repairing the damage in the correct order
When repairing an object like this with multiple areas of damage, always work on the large pieces first. Work down to the small pieces and then disguise the brake lines last. It is easier to adjust small pieces of marble as you go, instead of a large piece towards the end. Small pieces can be replaced with a resin filler if needed.
Putting the pieces together
The first thing I do is to put all the pieces together without any adhesive. This is to see how bad the brake line is and see if there are any other pieces missing. There may also be some loose material to remove to help the pieces sit together properly. When all the are pieces together, I can then decide the best way forward to achieve the best results possible.
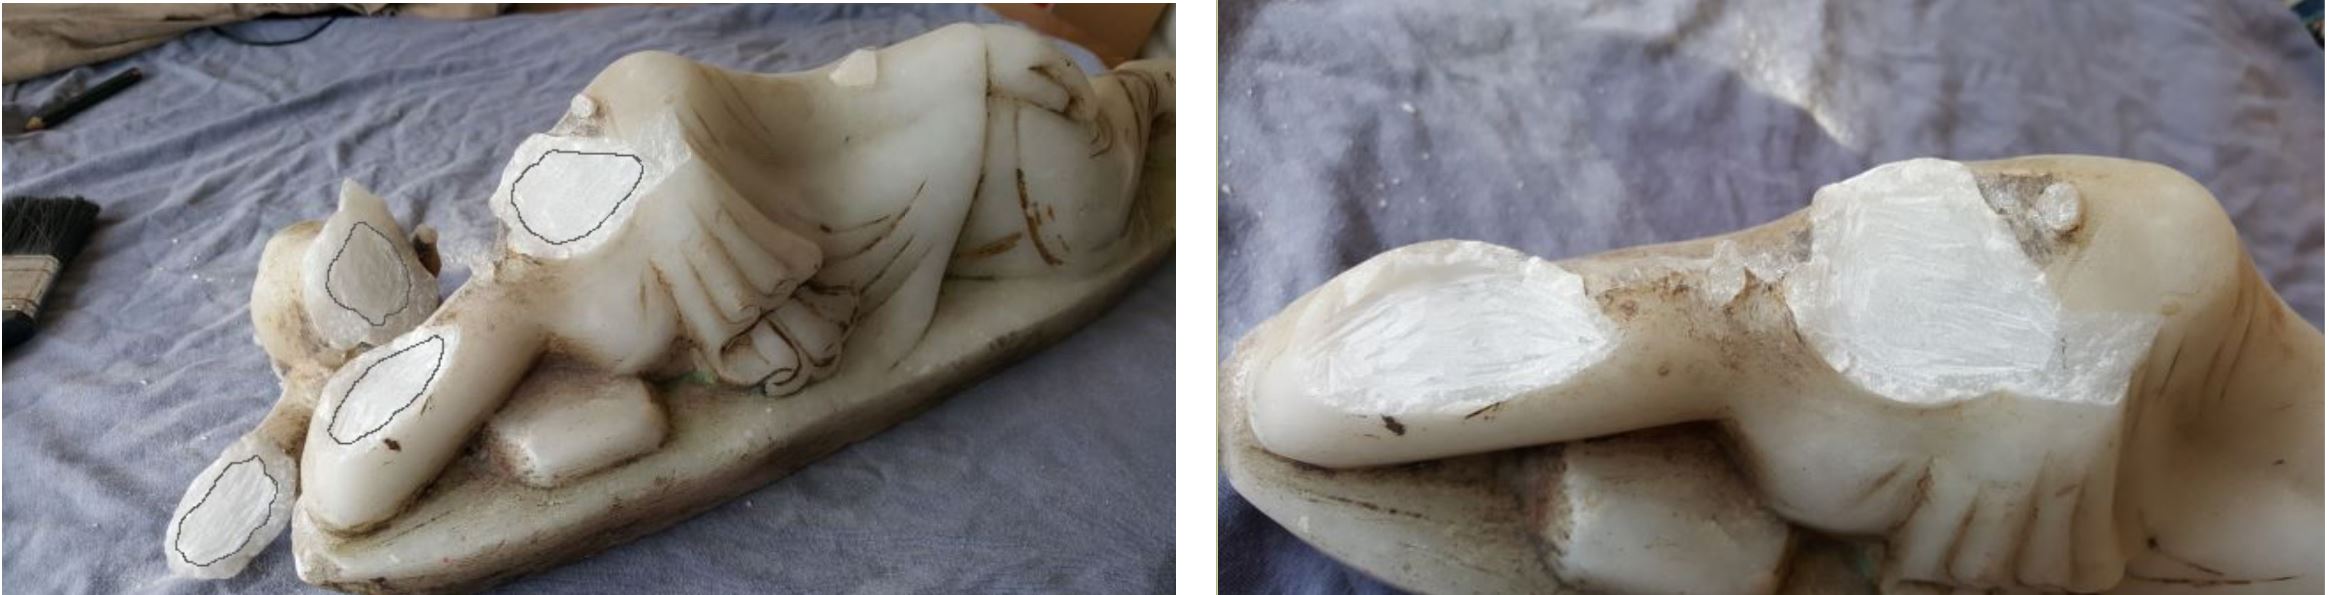
Milling out the damaged area
The first stage is to mill out the centre of the damaged area on both pieces. Leaving the outer edge of the break line untouched. The bulk of the adhesive will sit in the space that I have milled out. A gap of 4 or 5 millimetres between the outer edge and the area in the middle is left untouched. By leaving the outer edge as it is I will have a near perfect fit when joining the 2 pieces together.
I will not apply any adhesive to this area. The stone dust from the centre of the damaged area that was milled it out is kept. It will be used to repair the fragmented parts of the brake line later. I will also use it to repair the part of the chip that is missing.
Fixing the head back in place
Decant a very small amount of your mat seal into a container and apply a thin coat around the outer edge of the brake line on both the pieces. As we are not going to apply any adhesive to this part of the stone the seal will stop any dirt from building
Mix your white resin adhesive with the hardener no more than 3% hardener to the volume of adhesive, we do not want it to set too quickly. You will only have 2 or 3 minutes before it starts to set.
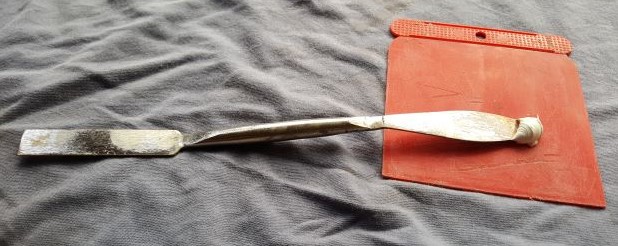
Tip; You can use a putty knife to mix and apply the resin. I find using a plasterers leaf and square tool does a better job. The shape of it makes it easier to mix and apply small amounts of adhesive or filler.
The resin mixture is applied to the area that I milled out, enough to fill both pieces. Gently they are pressed together, and any excess adhesive is removed before it touches the out edge. While holding them together I check around the edges and feel any lips. If there are any, I adjust it slightly before the adhesive sets.
Once fixed together it will feel smooth all the way around. If you feel no lips around the edge, then you have a perfect fit. After 2 minutes while the adhesive is setting, I apply a little more of the seal around the repair line.
Repairing the chip
After about 10 minutes I can start to work on the larger chip.
I use the crystal-clear resin for this part of the project. This type of resin will take up to 24 hours to set. It has a working time of about 5 to 10 minutes. When the 2 parts are mixed together it turns to a yellowish colour. Once it has fully set it will return to a clear finish.
A very small amount of the clear resin is applied to the area where the chip is to be fixed to. I remove as much of the excess as possible until you can barely see any adhesive. A small chip like this will not need much adhesive to hold it in place.
The two pieces are very gently pressed together. Too much pressure and the chip will break. Any excess adhesive around the edge is removed with the knife blade. None of the adhesive can be smeared over the marble as it will affect the finish.
Disguising the repair line
To repair the brake lines and the area next to the chip where the piece was missing. I mix a small amount of the clear resin this time adding some of the stone dust that was saved. The ratio is 30% dust to 70% adhesive for this part of the process. Only add the hardener after the stone dust and resin have been mixed together.
Applying a little pressure, I work the mixture into the brake line. I use the knife blade to apply a small amount to the area next to the chip. To avoid smearing the adhesive over the marble I start in the middle and work it out towards the edge.
After 24 hours this will set well enough for the excess to be removed. Very gently the excess is shaved off with a new knife Blade. By not sanding off the excess the original finish is not affected.
For the final stage, I mix a small amount of the colour intensifier with some dirt. I dab some of the colour intensifier and dirt onto the stone with the little paint brush. This is done at intermittent points along the repair line and either side of the line. This will break up the line. I do the same thing around the area where the ship is.
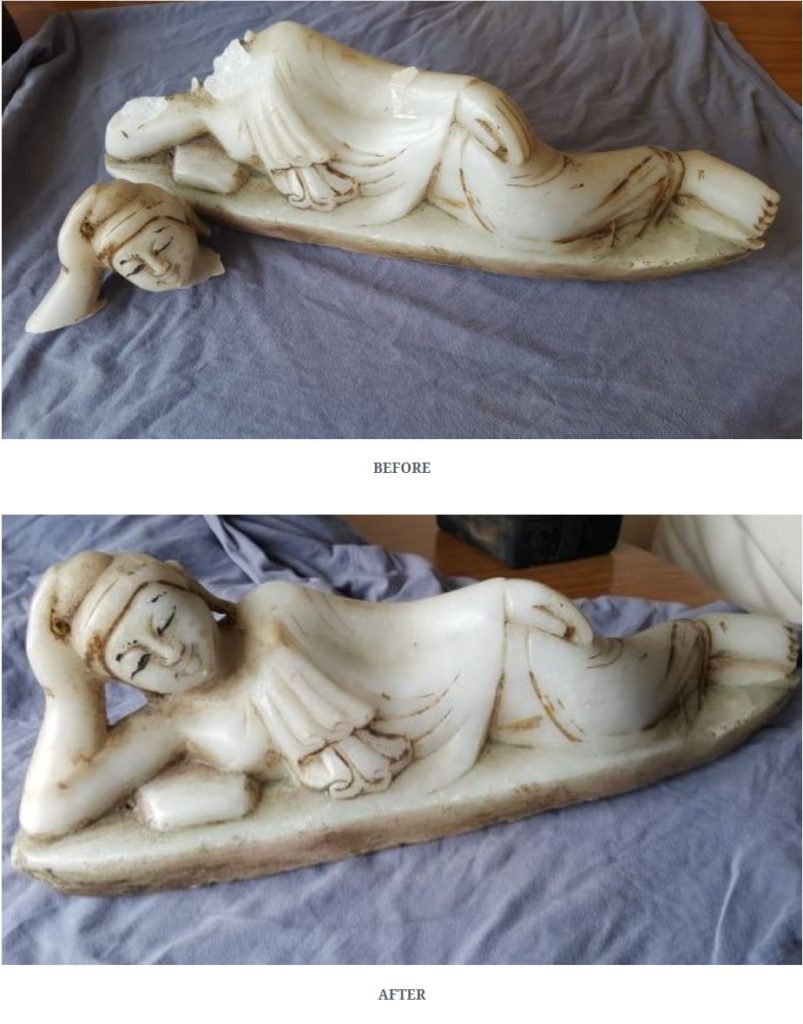
THE ORIGINAL WEATHERED LOOK IS RETAINED AS PER THE CLIENTS INSTRUCTIONS.