Introduction
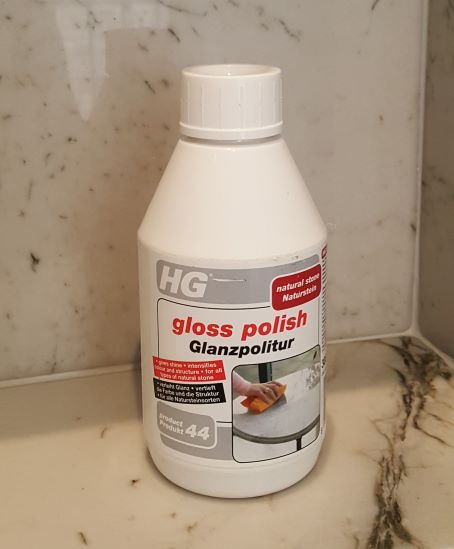
I have a variety of Natural Stone polishes that I use and recommend to my clients. HG Gloss Polish is a polish I have used for many years on Marble, Granite and Polished Limestones like Travertine. It is HG’s Product Nº 44, so if you do decide to go ahead and buy it you can find by the product name or number. It is also listed on some sites as HG Natural Stone Polish.
The polish comes in a 300ml bottle, which is good for an area of approximately 10 square metres.
What does this Natural Stone Polish do?
HG’s gloss polish is intended to give or restore a natural gloss to all kinds of natural stone surfaces, including kitchen worktops, floors, tables, window sills, thresholds and any other surfaces made of marble, granite, limestone and other natural stones like onyx for example.
It is also specially formulated to restore and deepen the colour and the structure of natural stone and will protect it against dirt and light scratches.
It’s important to say that this is a polish, not a cleaning agent – it will not remove marks or stains from natural stone. It will not remove scratches, but it will help to hide light scratches. The same is also true for etch marks caused by alcohol or lemon juice etc. It will bring back the colour and shine but when the polish wears off the etch mark will still be there. In that respect I have found all polishes of this type to be the same.
This is how I apply HG Gloss Polish
What you will see when you apply it
When you first apply HG Gloss Polish, you will see it looks a little hazy when it dries. If you have applied the polish unevenly you will see the streaks as it dries. These streaks will be more visible when you buff it to a shine. To remove the streaks, leave the polish to settle for about 10 minutes and apply a very thin coat but this time work the polish across the streaks. Leave HG Gloss polish to dry for a little longer (About 2 minutes) and then buff it to a shine as described above.
How to hide dull spots with HG Natural Stone Polish
When you apply HG Gloss Polish and it dries it will not spread like some wax based polishes do when you start to buff it into the stone. There is a plus side to this. You can concentrate or build up the polish on little dull spots, blemishes and small scratches to a point where they are not so visible. It will not remove the etch mark or scratch but you can hide it without having to polish the whole surface.
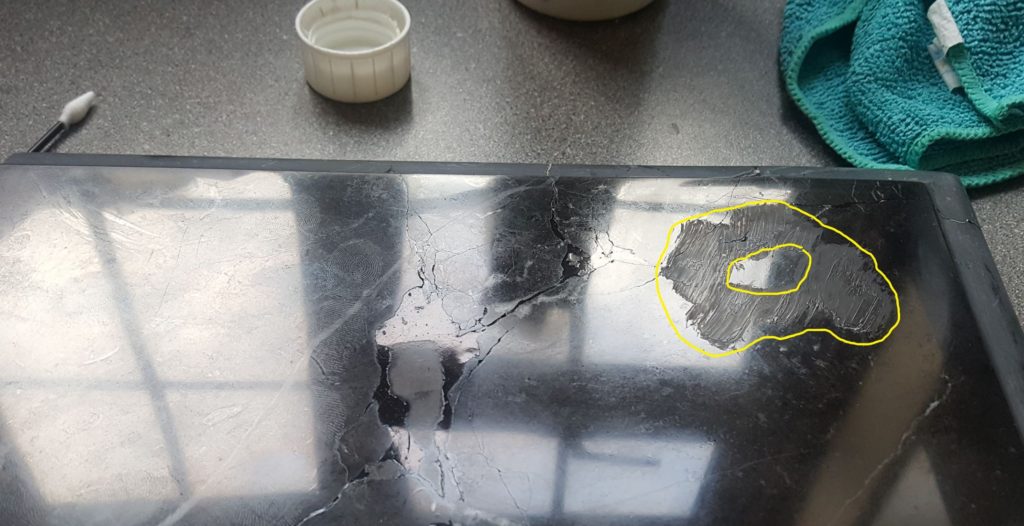
Here is an example I have created to demonstrate this point
Here is an old piece of polished Nero Marquina marble that I have deliberately etched with a small piece of lemon. Nero Marquina is one of the most difficult marbles to polish and acid etch marks are very difficult to hide on the darker natural stones. You will not be able to make it perfect but you can restore the colour and 90% of the shine.
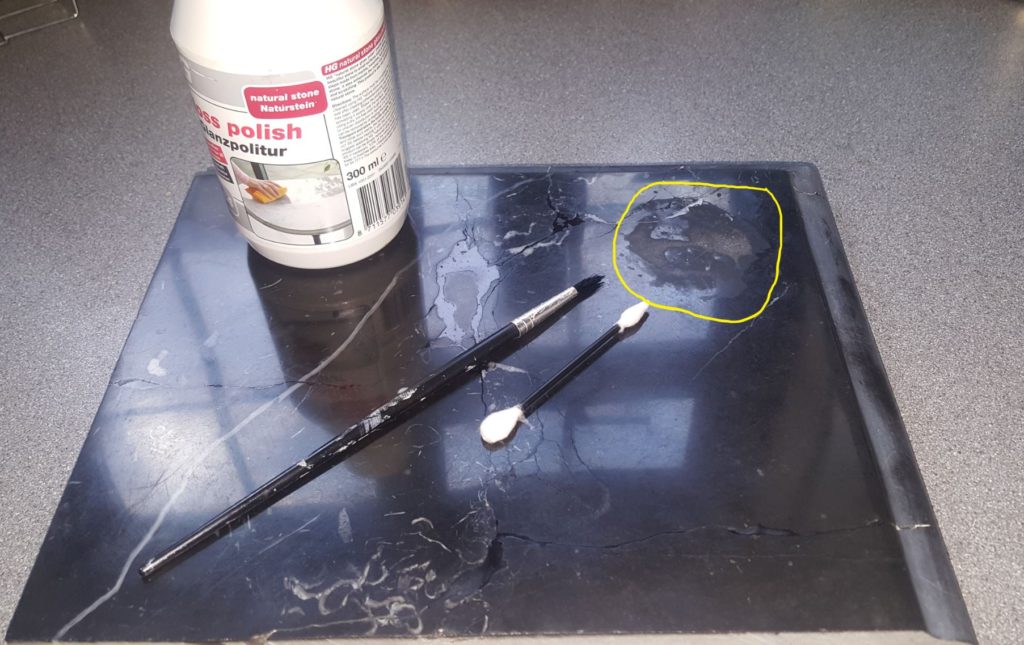
I use a small artists paint brush to apply the polish or a cotton bud, I use cotton buds regularly for testing and applying chemicals to small spots on Natural Stone.
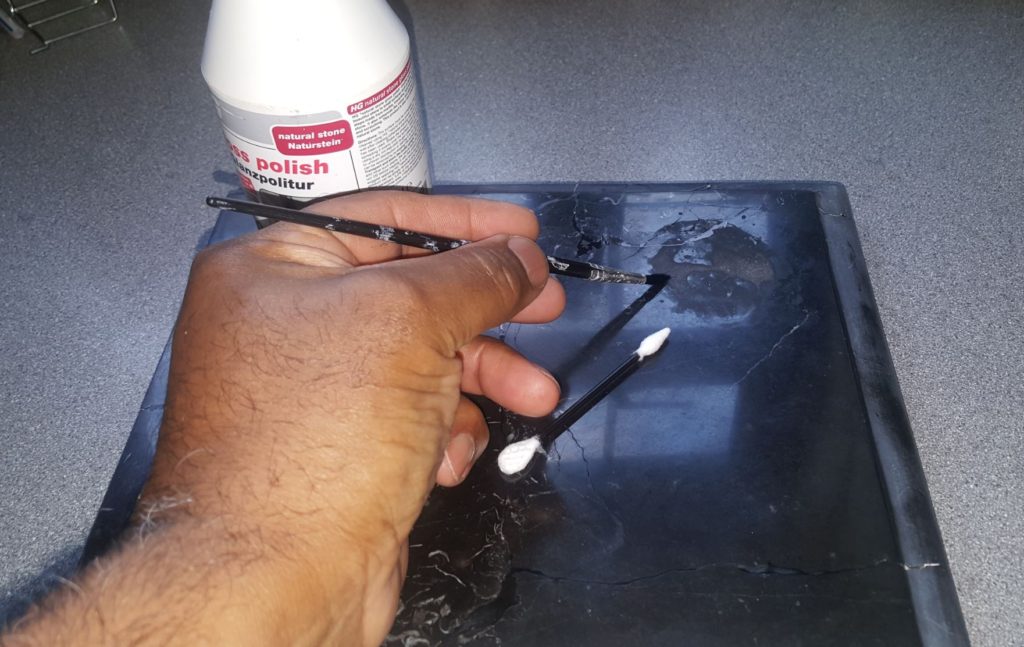
I have literally painted around the edges of the affected area with HG Gloss Polish.
Once the polish has settled for a minute or so I can then buff it to a shine. After just 1 application the colour has been restored, but it is still a little dull.
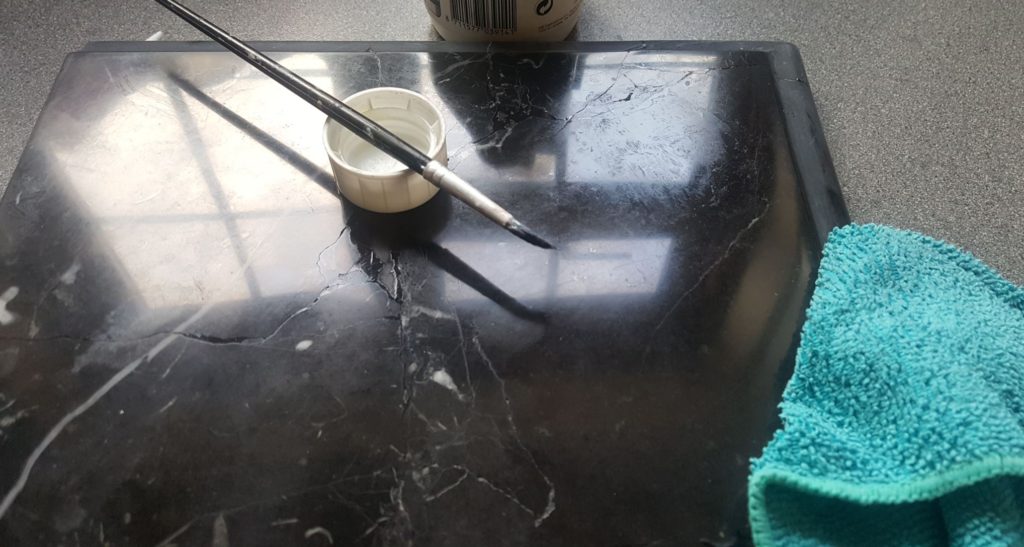
If necessary, apply the polish again to any areas that still look a little dull, until you have managed to get it as close to the surrounding area as you can. Each time you apply the polish leave it a little longer to settle before you buff it.
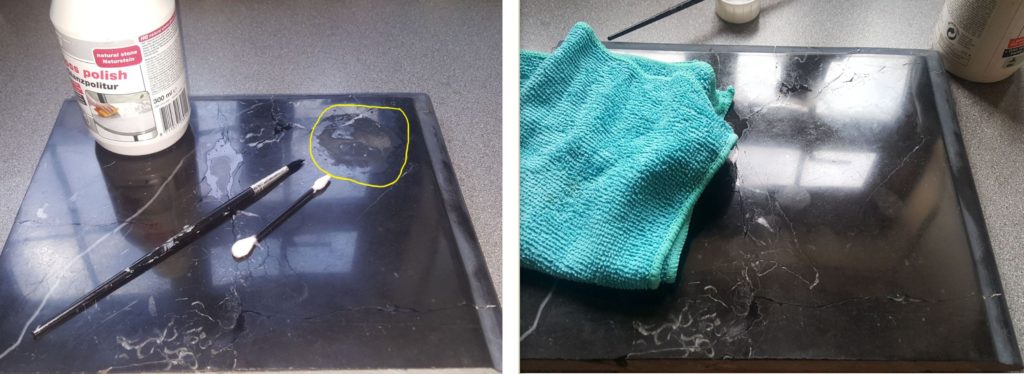
The photo above is after 4 applications of the polish on the same spot. Once you have done this you can if you wish polish a wider area or the whole surface for a more even finish.
Normally I would resurface a piece of marble like this to remove an etch mark before polishing it, but here you can see HG Gloss Polish has done a very good job of hiding the mark.

I hope the above example was helpful to you if you need some more advice on polishing marble you can call me on the number above or contact me by email.
If you have a similar problem click here to buy HG Gloss polish from Amazon
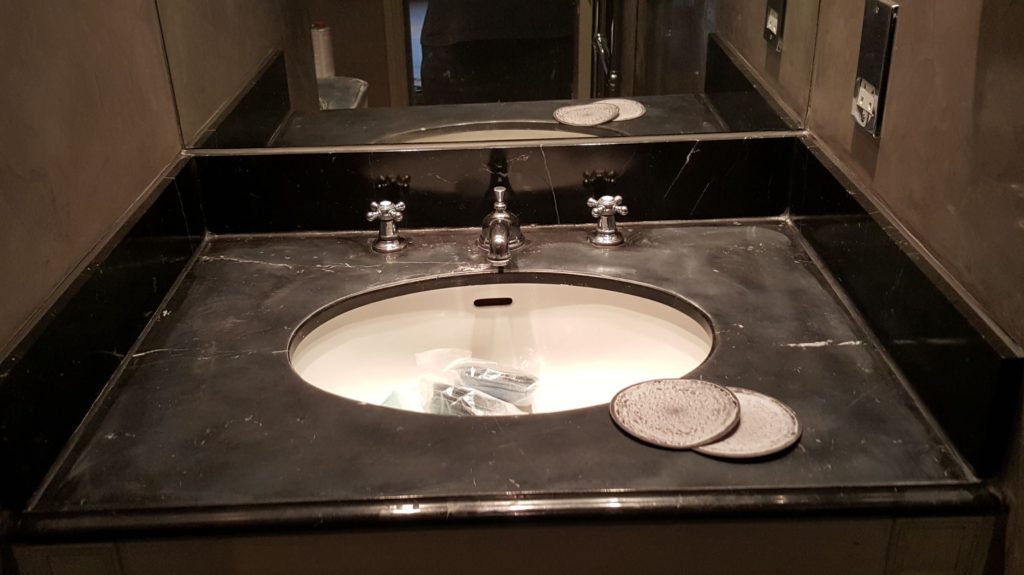
POLISHING AN ETCHED MARBLE VANITY TOP
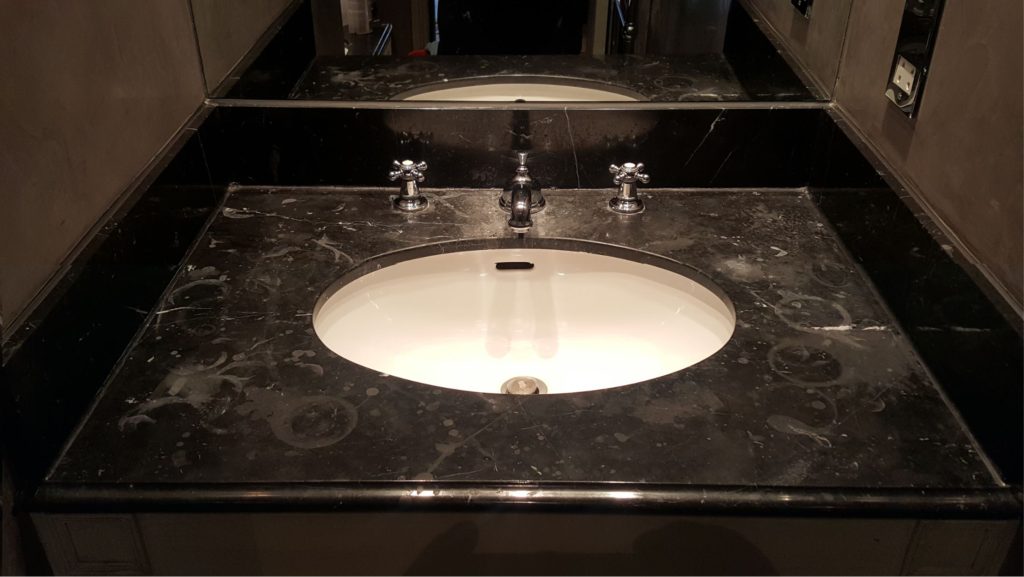
This marble vanity top in a London Hotel has been etched by various products, from After shave and perfume to soap water and use of the wrong cleaning agents.
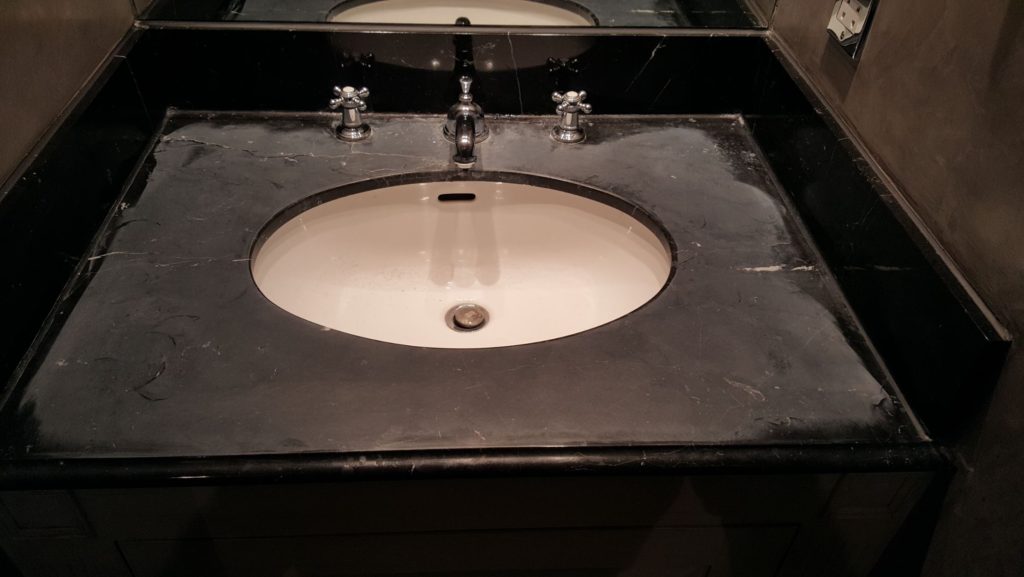
I sanded the surface back using a 400 grit silicone carbide sanding disk to remove all the etch marks. The surface is left with a flat finish and now I can start to restore the colour and shine.
The marble vanity top is then sanded back with a 600 grit sanding disk, followed by 800 and 1200 grade disks. The surface now has honed finish with most of the colour restored. The surface will now be cleaned with just water and the shine restored with a good Natural Stone Polish.
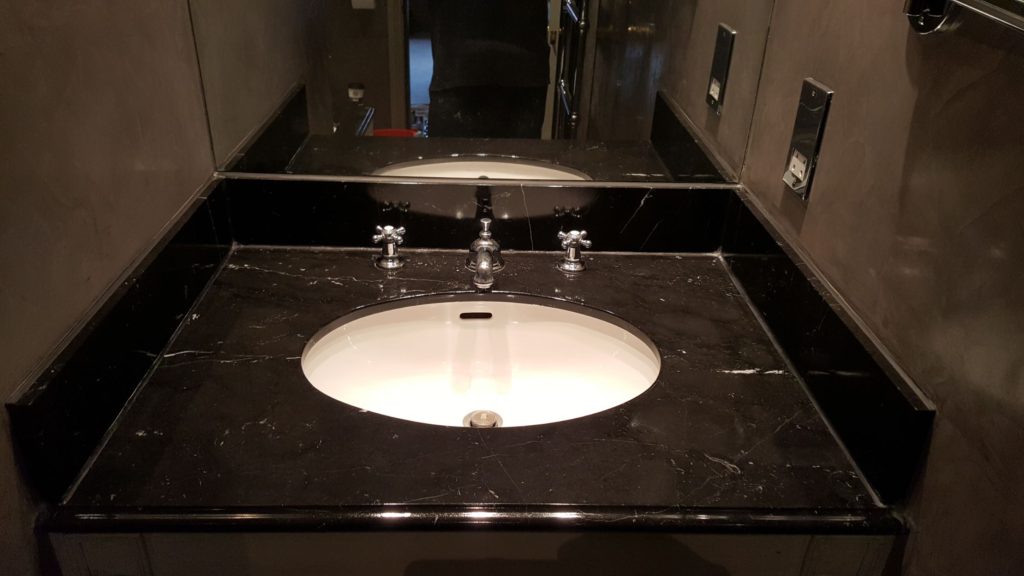
After being washed with hot water and left to dry for about 2 hours the Marble Vanity Top is polished with HG Gloss Polish for Natural Stone.