Here are five different fireplace repair and or restoration projects. The first a typical project I would undertake in my workshop, two smaller projects requiring minor repairs. The final project is a fireplace that had completely collapsed and had to be repaired on-site.
QUICK LINKS
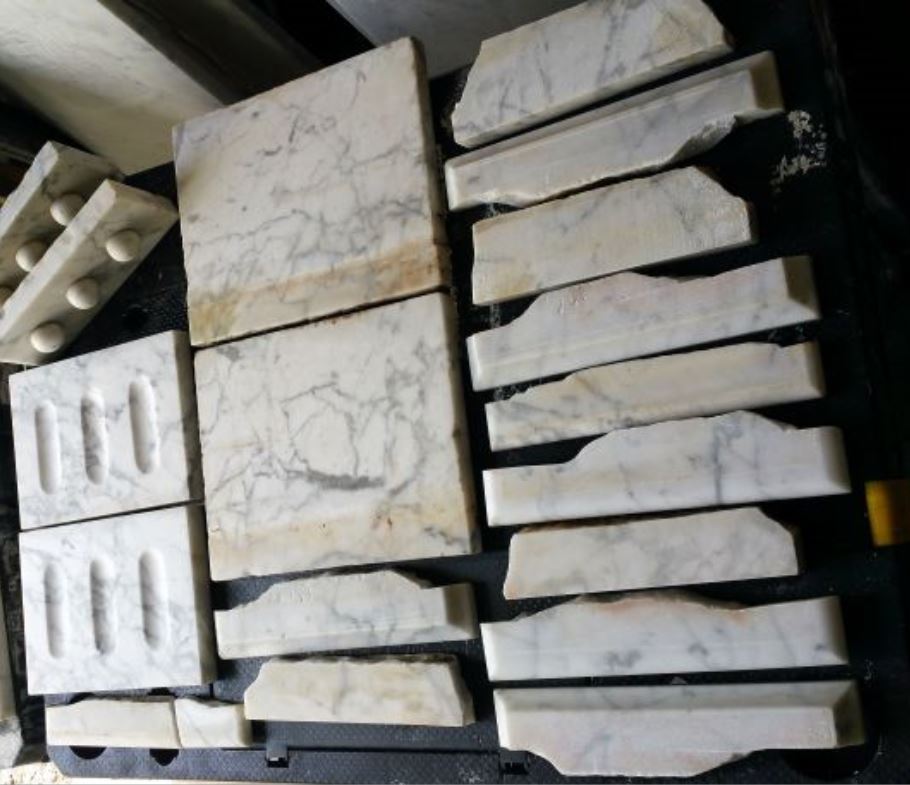
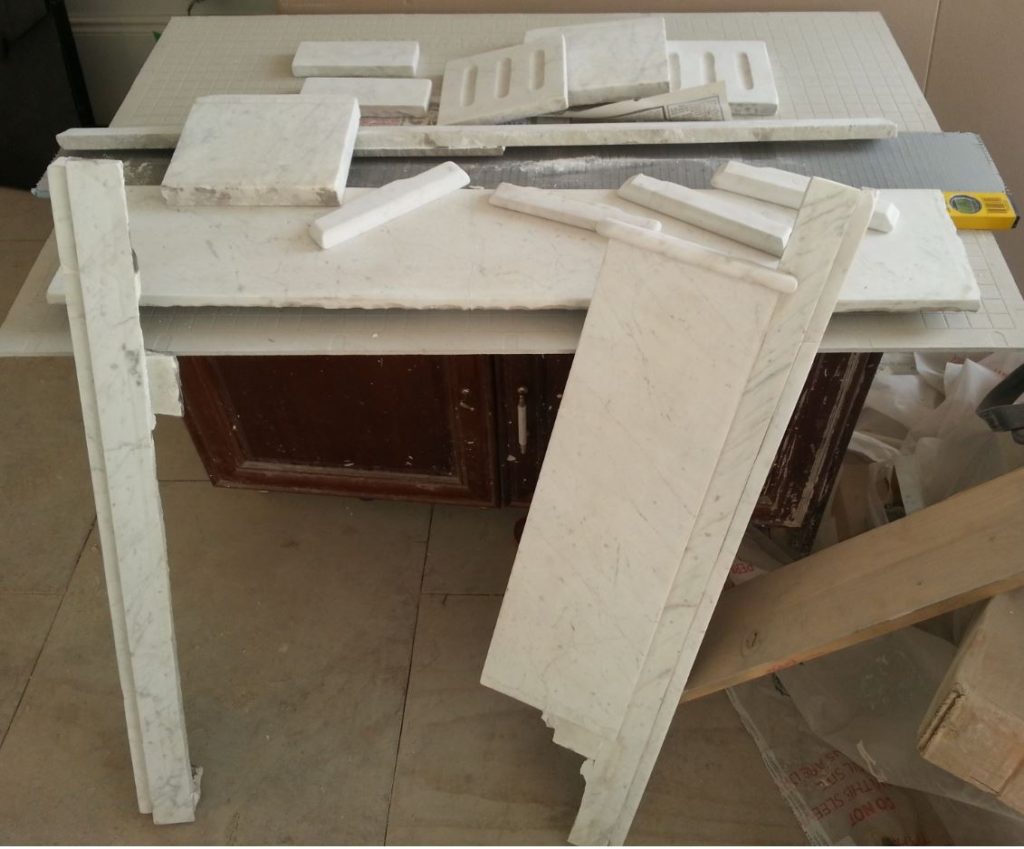
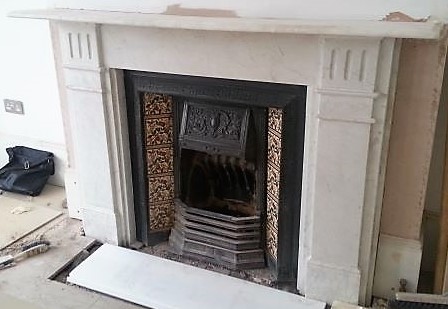
A Repair and Restoration in my workshop
A normal repair and restoration of a marble fireplace like this would involve removing the fireplace from the
SEPERATING THE PIECES.
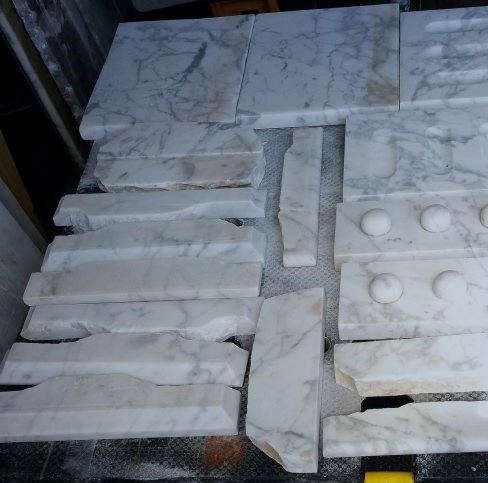
The first part of the process is to carefully separate the pieces of the fireplace and remove the old adhesive. The marble is very old and brittle and parts of it would have been affected by the heat from the fire. These are the 3 methods I use for removing the old adhesive from the marble, without damaging it.
3 METHODS FOR REMOVING ADHESIVE
CHEMICAL CLEAN.
Once all of the adhesive has been removed, each piece of marble is individually cleaned. In most cases, the stone is very dirty so I use a concentrated cleaning agent with a green or black scouring pad. To achieve the best results sometimes it is necessary to use 1 or more of the chemicals below.
CLEANING PRODUCTS
Here is a list of cleaning products and stain removers I normally use, basically I start by steam cleaning the stone with a diluted cleaning agent and increase the dosage depending on how ingrained the dirt or stains are.
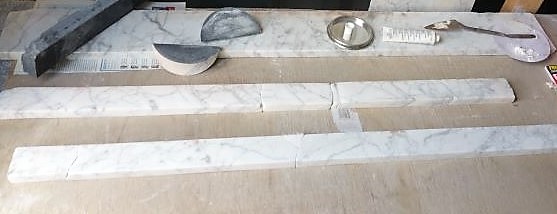
SANDING BACK
After cleaning all of the individual pieces will still have visible signs of wear. The edges will be chipped and rough, the face will be scratched and pitted. Each piece will be individually sanded back by hand to a honed finish.
YELLOW / BROWN STAINING
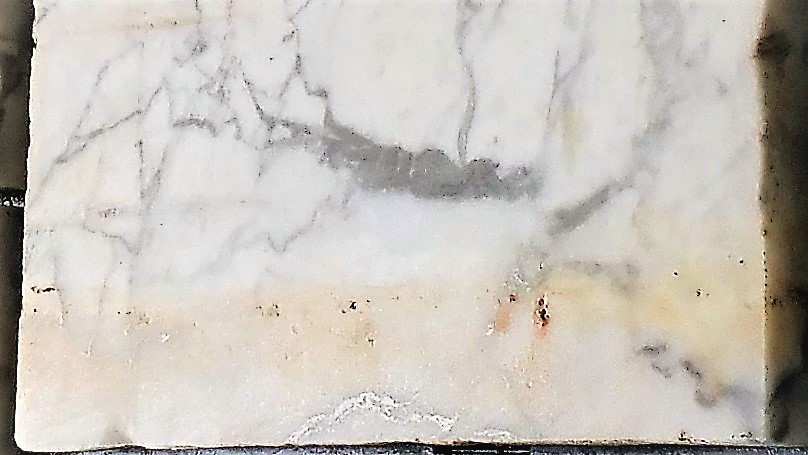
The yellow/brown staining that you can see is caused by the iron minerals in the marble and can never be completely removed. However, when the marble is sanded back to a honed finish they are less visible. If you were to polish the stone the stains would then be more visible, for this reason, I will leave it with a honed finish.
REPAIRS
The larger damaged pieces are laid on a flat surface and repaired with a white resin adhesive. Normally I would strengthen pieces like this with a piece of tile or a piece of granite. In this example, it is not necessary to do so when all of the pieces of the fireplace are glued together that will increase the strength of the repair.
NEW FIXING BLOCKS
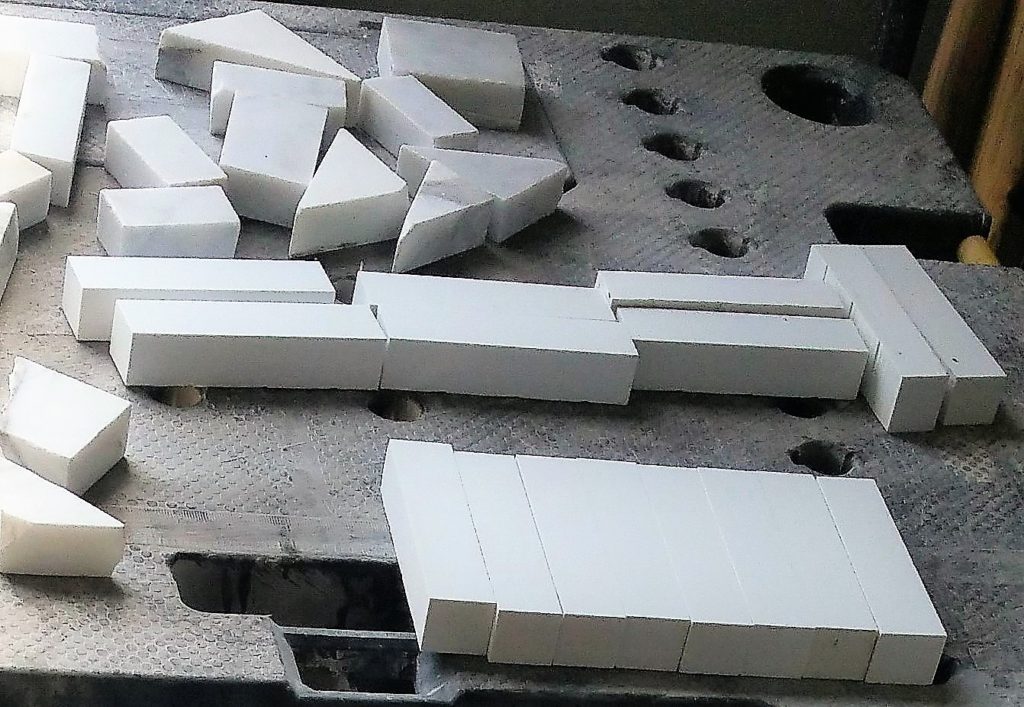
Before I can glue all the pieces back together I will need to make some new fixing blocks. Generally, I use odd pieces of marble or granite that I have available. I prefer to cut up small pieces of any compact quartz material that I have to hand. The compact quartz is lighter and stronger than natural stone.
REASSEMBLING THE FIREPLACE

The pieces are glued together using the various size and shaped fixing blocks I made, and a two-part resin adhesive.
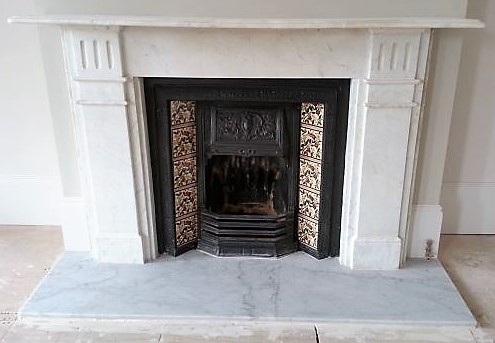
The two sides of the fireplace are reassembled and squared off at the bottom so that it can stand up independently. When the fireplace is sold it will make fitting easier.
The frieze and the shelf of this fireplace had very little damage in the way of chips, scratches or stains. It was just a simple job to sand them back to match the finish of the rest of the fireplace. All the sections of the fireplace were given a final clean before being sealed with a silicone impregnator.
RETURNING THE FIREPLACE

The fireplace was returned to Westcombes Fireplaces which was on display in their shop before being sold and fitted by their expert installation team.
Westcombe’s have a wide range of marble fireplaces for sale both new and old. These and other types of fireplaces and stoves can be viewed in person at their well-stocked shop, together with an extensive range of accessories and consumables.
Westcombe’s are located in SE London. Their full address and contact details can be found at https://westcombes.co.uk
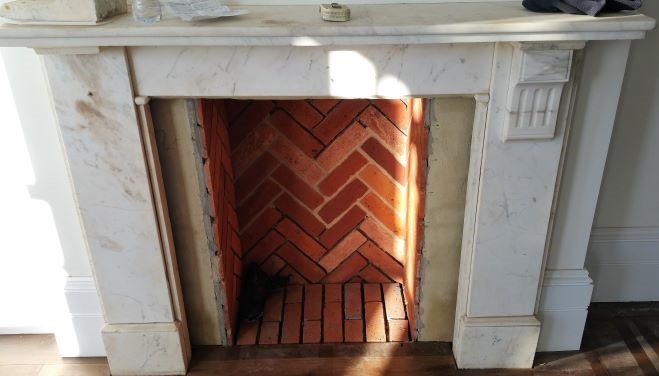
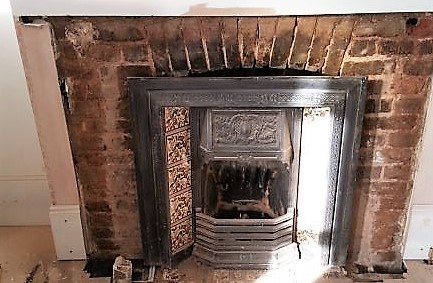
REPAIRING A DAMAGED FIREPLACE IN SITU

The Damage.
The owners of this property were adding extra living space by increasing the size of the basement. The front side panels and internal slips of this fireplace had fallen away, due to the vibration of excavation works in the basement. The fireplace did have some historical damage and there were signs of previous repairs.
THE REPAIRS.
The damaged sections were removed and cleaned. All the loose material and old adhesive in the fireplace was removed. The old fixing blocks were cleaned and re-used. I repaired the front panels and internal slips with a resin adhesive to match the colour of the stone, all were then fixed back in place.
FINISHING TOUCHES
There were some smaller chips around various parts of the fireplace, all were repaired with a resin-based filler to match the colour of the stone. The marble was then cleaned and polished to match the original finish.
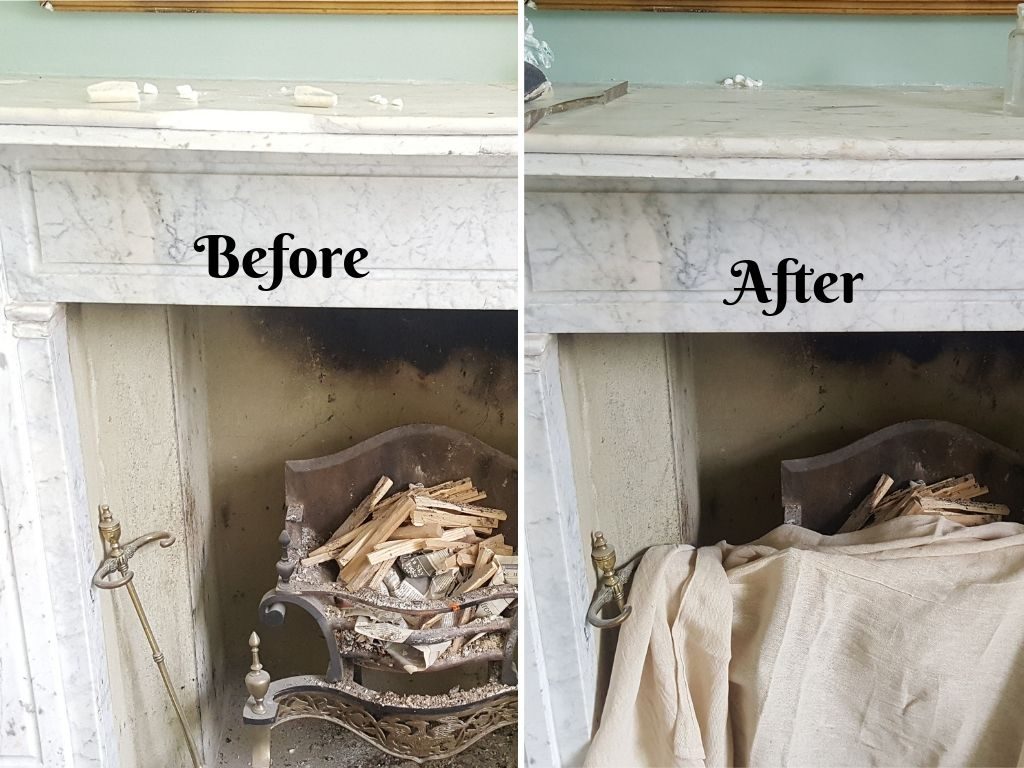
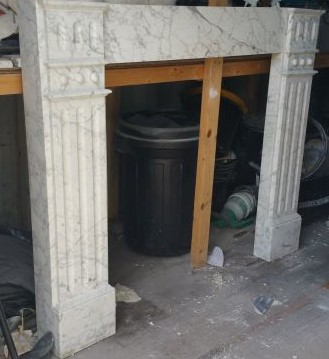
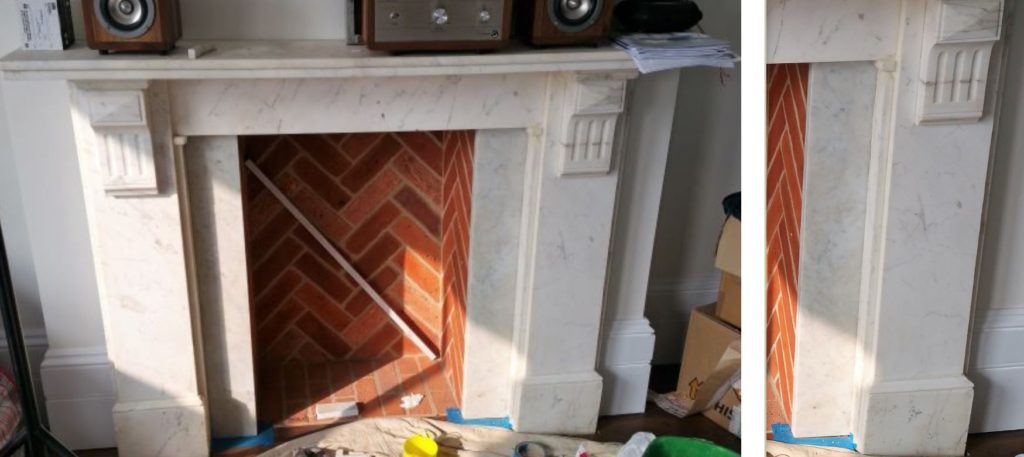
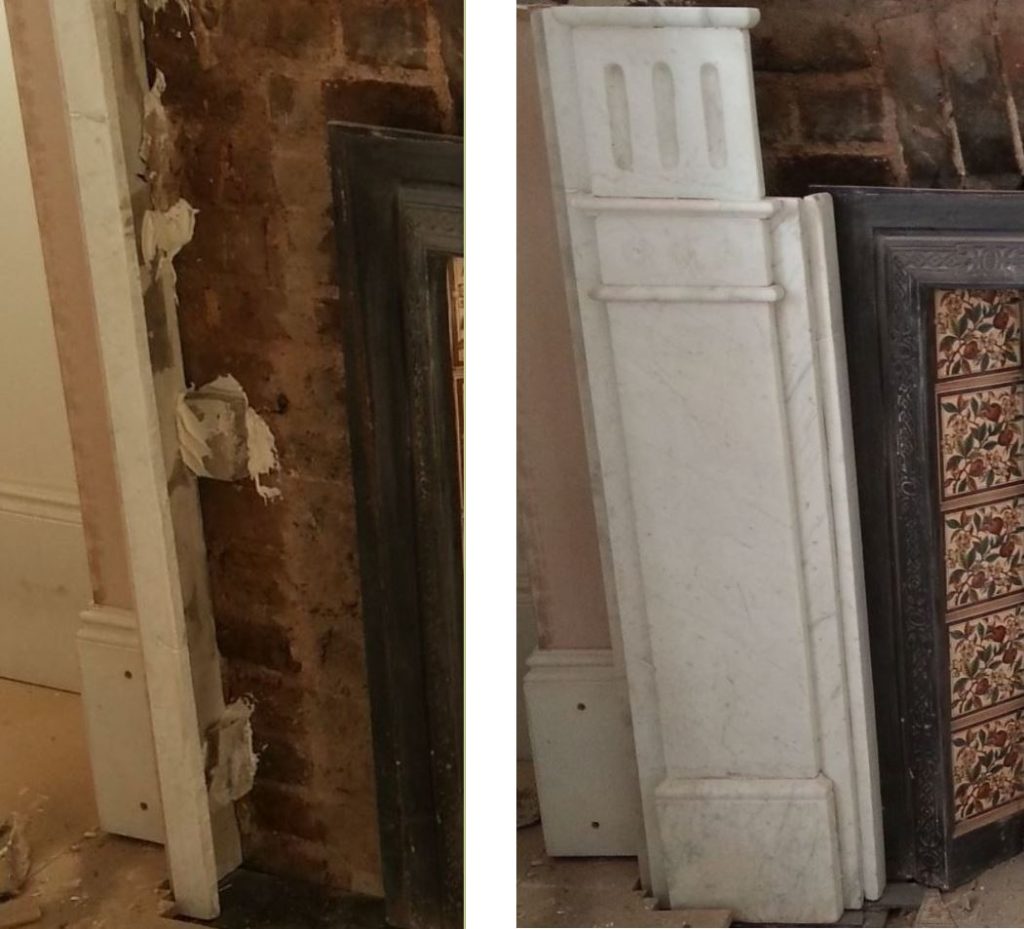
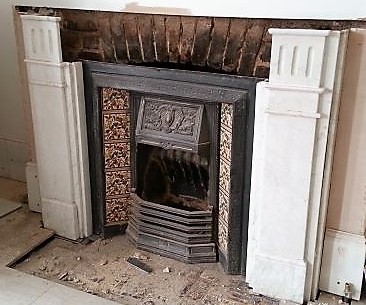
REPAIRING A CARRERA MARBLE FIREPLACE
THE PROJECT
My clients wanted the fireplace to be cleaned and repaired. In addition to this, they wanted to cover the
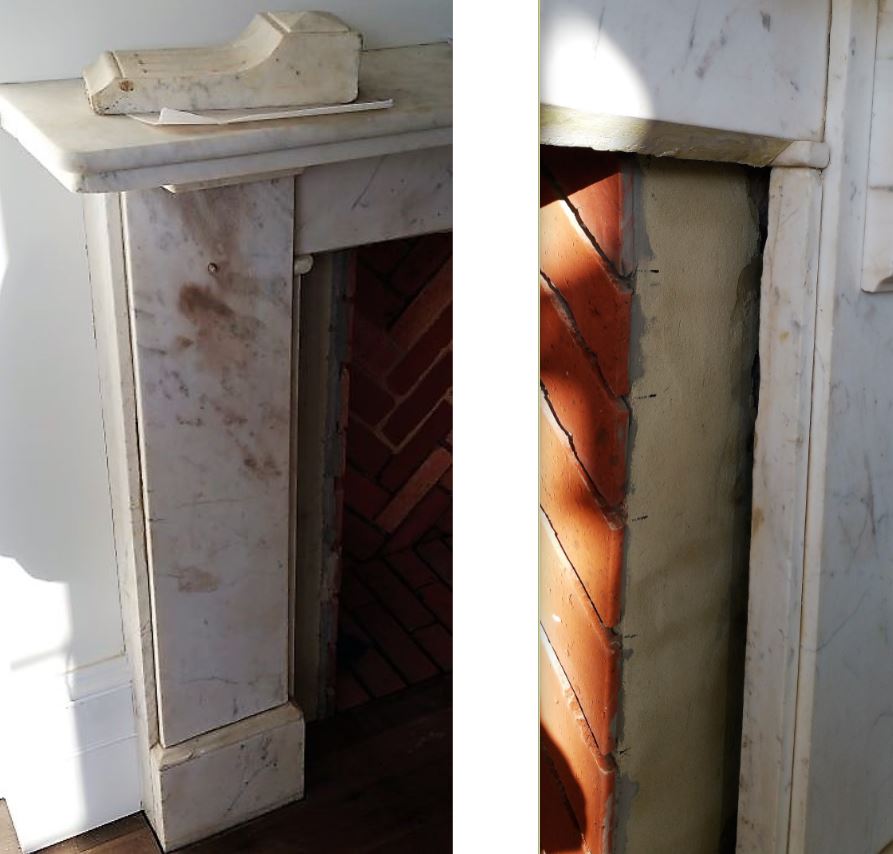
DAMAGE AND STAINS
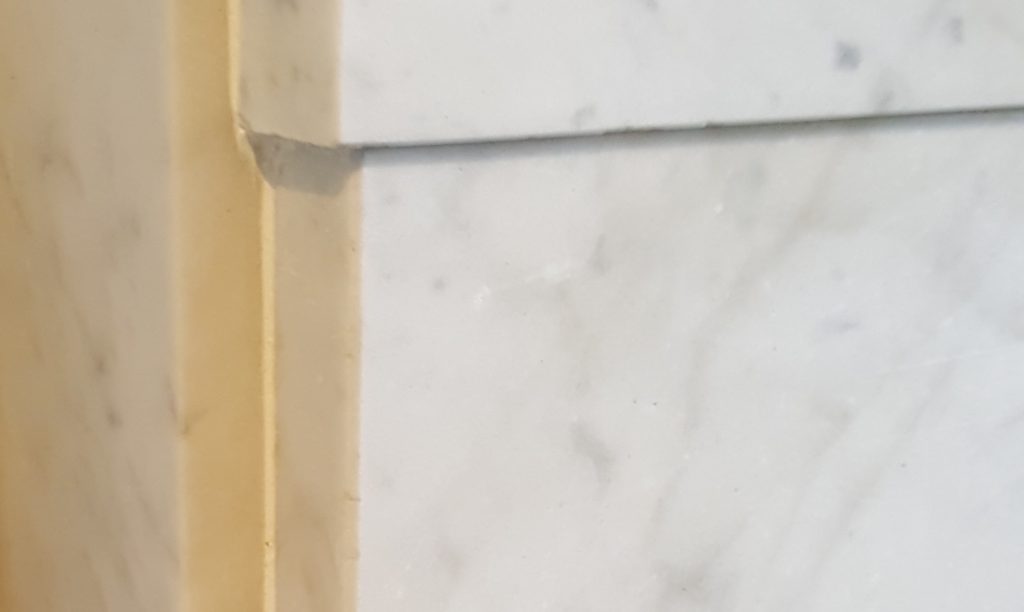
One of the corbels of this Carrera Mable Fireplace had fallen off when the old cement adhesive had failed. There was also some staining which was caused using the wrong type of adhesive when trying to fix it back in place. There was also some light-yellow staining.
THE PROCESS
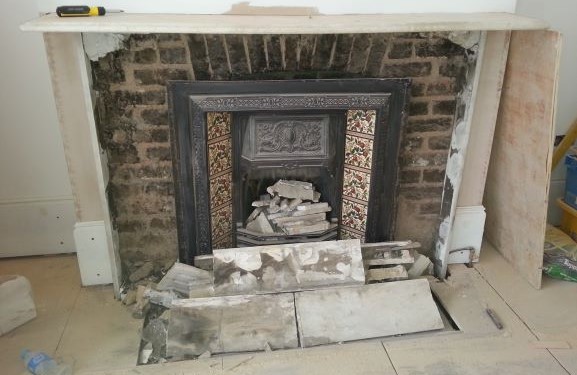
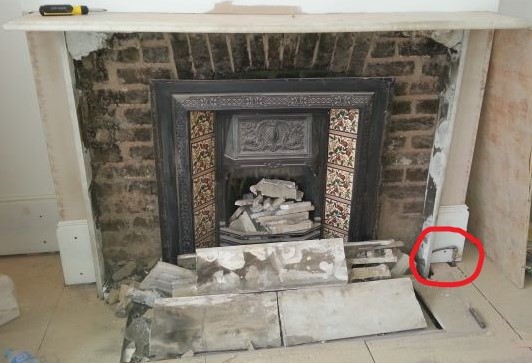
A FULLY COLLAPSED MARBLE FIREPLACE
The fireplace in the image below had a few more challenges than normal. The damage to this fireplace was caused originally by a plumber trying to fit a small gas pipe behind the outer slip of this fireplace. The circle to the bottom right of the photo indicates where the gas pipe is. The damage was made worse by the contractors, who were refurbishing the property trying to fix the problem. Unfortunately, this resulted in the full collapse of the fireplace leaving just the two outer slips and the shelf in place.
This Fireplace Could Not Be Moved
Because of the sensitive nature of this project this fireplace had to remain at the property. It also had to be fitted back into its original position because the fireplace opening was set in place and the plastering around the fireplace was mostly complete. For this reason, the proportioning and spacing of the pieces had to be exactly as it was before the damage.
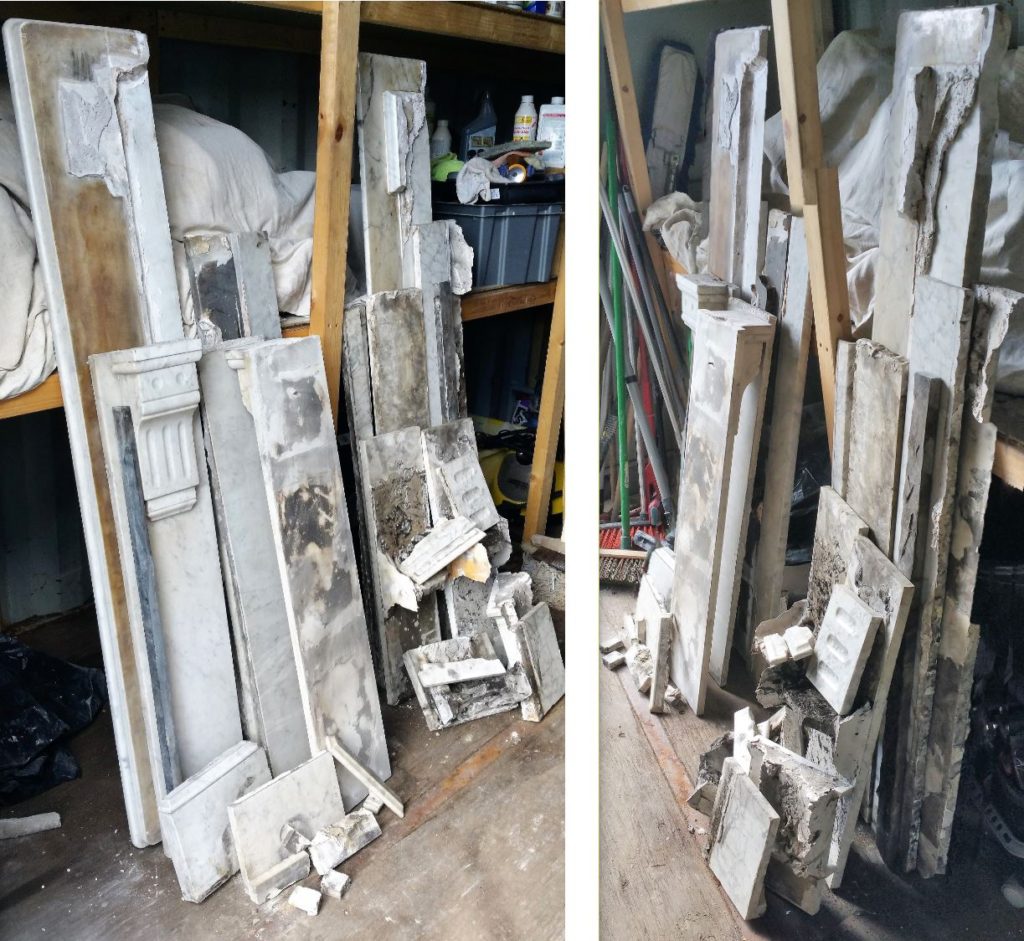
Cleaning And Removing The Old Adhesive
Most of the parts had separated when the fireplace collapsed, with the worst damage being to the frieze which was broken in two. Parts of the left side of the fireplace was still intact, so I decided not to separate them but just fit some additional fixing blocks between them and clean it as one piece. This would help as a guide with correct proportioning and spacing when refitting later in the process.
All the other pieces had the old adhesive and fixing blocks removed. Each piece was then individually cleaned and lightly sanded back by hand to remove any pitting and light scratches. The cleaned and sanded marble would then have a honed finish. The frieze and all the other pieces with any damage were repaired with a white 2-part resin adhesive and lightly sanded to a honed finish.
Preparing the Area
The brickwork behind the marble fireplace had to be cleaned and prepared before I could fix the fireplace back in place. The bricks were cleaned with a wire brush and the old adhesive and any other loose materials were removed. A PVA was then applied to the clean bricks and left overnight to dry.
Fitting The Fireplace Back Into Its Original Position
The Fireplace is refitted by first fitting the left side outer slip with new fixing blocks and adhesive followed by the left leg as this was the part that was mostly intact. The left side was then secured to the metal fireplace opening.
The right side was then put together piece by piece before being fixed to the other side of the fireplace opening. The two sides of the fireplace were now secured to the wall and the fireplace opening. This was then left overnight, the 2-part resin adhesive I used sets very quickly, but it takes a few hours fully cure.
Fitting The Frieze And Shelf
The frieze and the shelf are very heavy, so it is best to fit these last two pieces of the fireplace when the adhesive is fully cured. The two sides can then comfortably hold the weight. The frieze was easily fitted and fixed to the two sides of the fireplace, however, the shelf was a little more difficult as it had to be fixed in place without damaging the plasterwork around the shelf. It was a tight fit but with the help of one of the other contractors, we managed to squeeze it in place.
Grouting the joints
It is not always necessary to grout the joints of a marble fireplace, but in a project like this if the stone is very old. Parts of it will be badly pitted, so it would have to be sanded back. Some pieces would require more sanding than others and this would result in small gaps in the joints. To remedy this and sharpen up the whole look of the fireplace I like to work some white grout into the open joints.
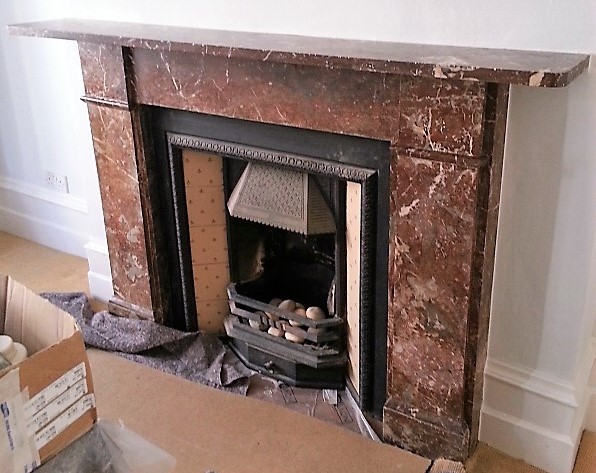
FINAL CLEAN AND SEAL
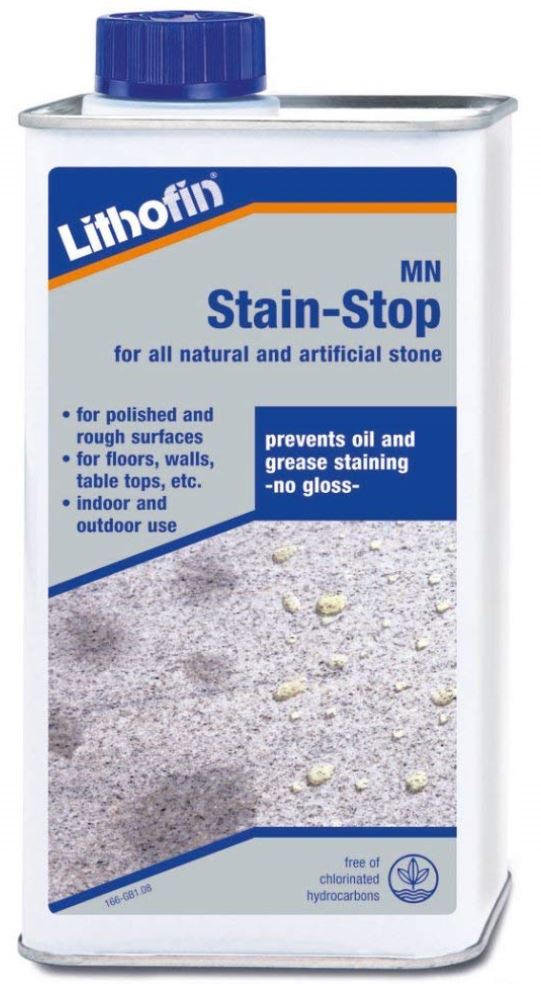
After a final clean and the fireplace is dry the marble is then sealed with Lithofin Stain-Stop silicone impregnator. I like to apply at least two coats of impregnator to a honed marble like this. You will find that the marble absorbs all of the first coat within just a few minutes. The second coat will take longer typically between five to ten minutes to be fully absorbed into the marble. Once the marble has absorbed all the impregnator that it can the excess is removed before it dries on the surface of the marble. Applying an impregnator will protect the marble from deep staining and will make future cleaning easier.
Fitting A New Hearth
Once the repairs were completed and the marble cleaned and sealed, the contractors arranged for a third party to template, supply, cut and fit a new marble hearth. The new hearth was paid for by the contractors as a gesture of goodwill towards the property owners.
HOW TO REPAIR A CHIP ON A MARBLE FIREPLACE
A chip on a marble fireplace can be repaired in one of three ways, depending on the damage.
REPAIRING A LARGE CHIP WITH MARBLE RESIN AND STONE DUST
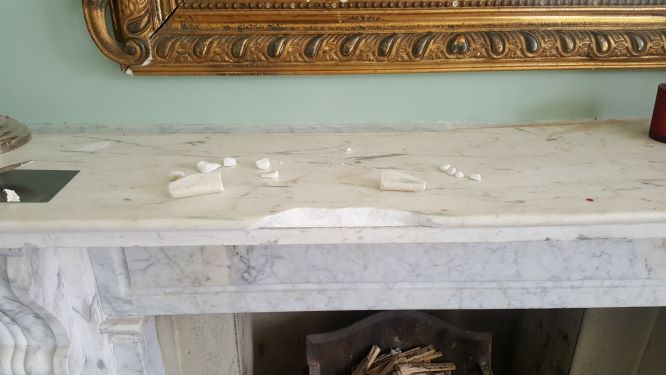
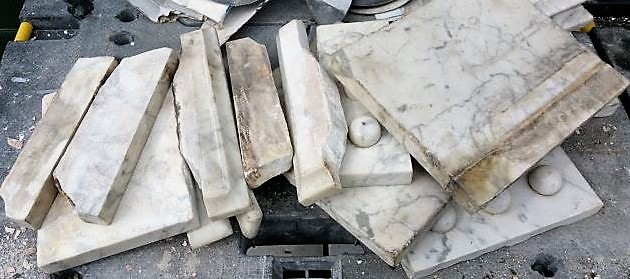
The damage on the shelf of this marble fireplace was caused by some workmen, possibly resting a ladder against it. The marble was very brittle, and a lot of the damaged pieces had crumbled into dust. There were, however, 3 or 4 solid pieces that I could use to start the repair.
The client wanted to retain the original weathered look of the fireplace. I had to avoid doing too much sanding around the damaged area. This would clean the marble and it would stand out from the rest of the fireplace.
For repairs where there are several broken pieces, I always start with the larger pieces first. Once the larger pieces are in place, I can use them as a base to build on and secure the smaller pieces. It is also easier to adjust the smaller pieces if you must.
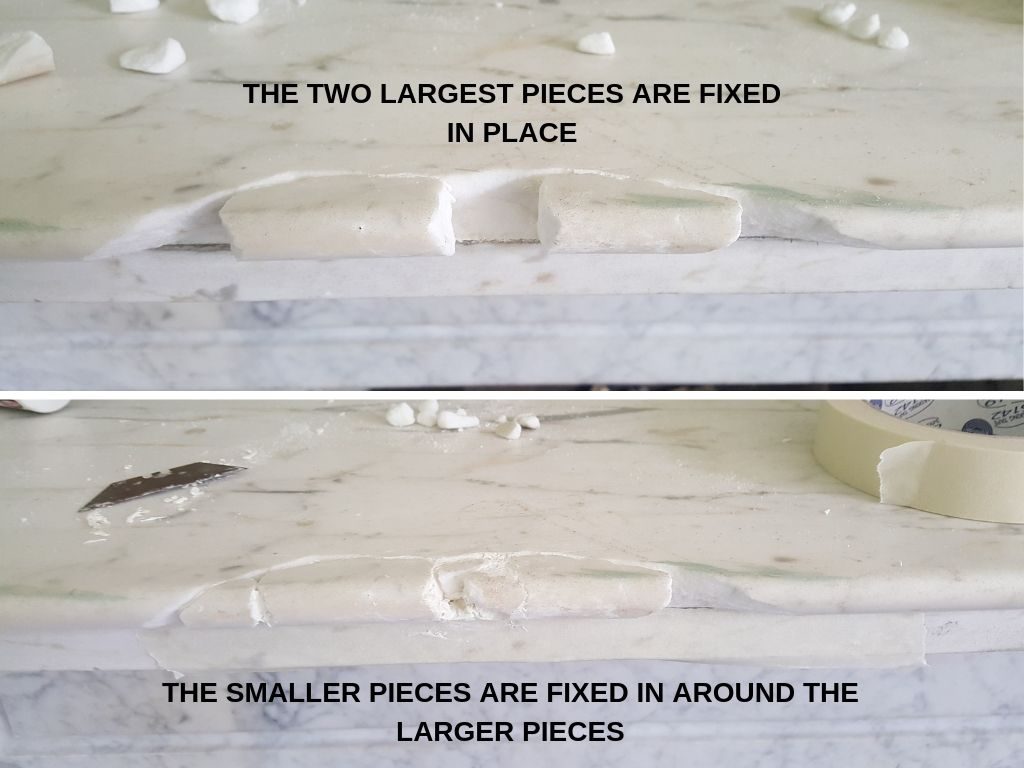
I used a white resin to fix all the pieces in place, most of the excess of the white resin was removed. The basic white resin is not a good colour match for this type of marble. The less of it that is visible around the repair lines the better.
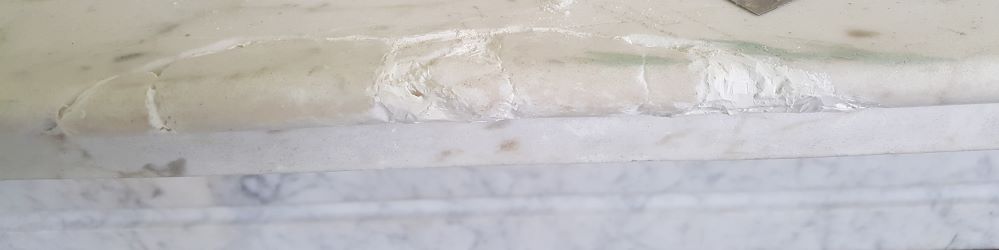
White marble like Carrera is one of the most difficult colours to match
There were a few gaps in the repair that could not be repaired with the original pieces of marble. I filled the larger gaps with white resin. Once set, I shaved the white resin back by about 3mm all round.
There were a few small pieces of marble that could not be used for the main body of the repair. These little pieces were crushed to make stone dust. To hide the repair lines and the smaller gaps, I use a combination of clear resin mixed with stone dust.
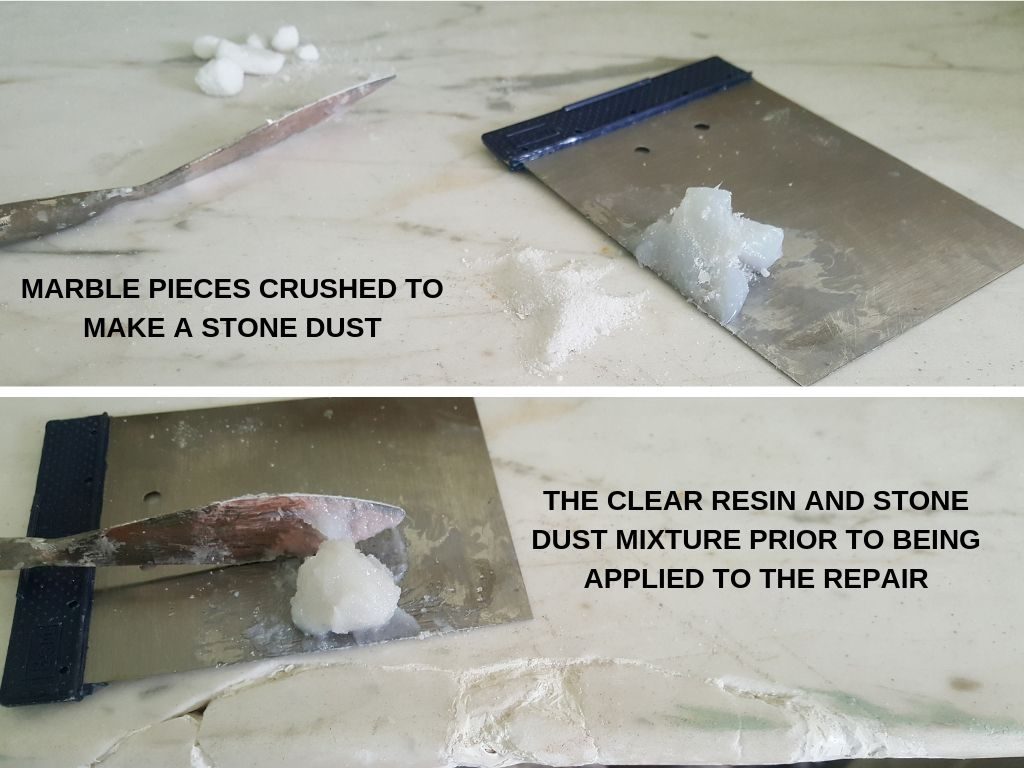
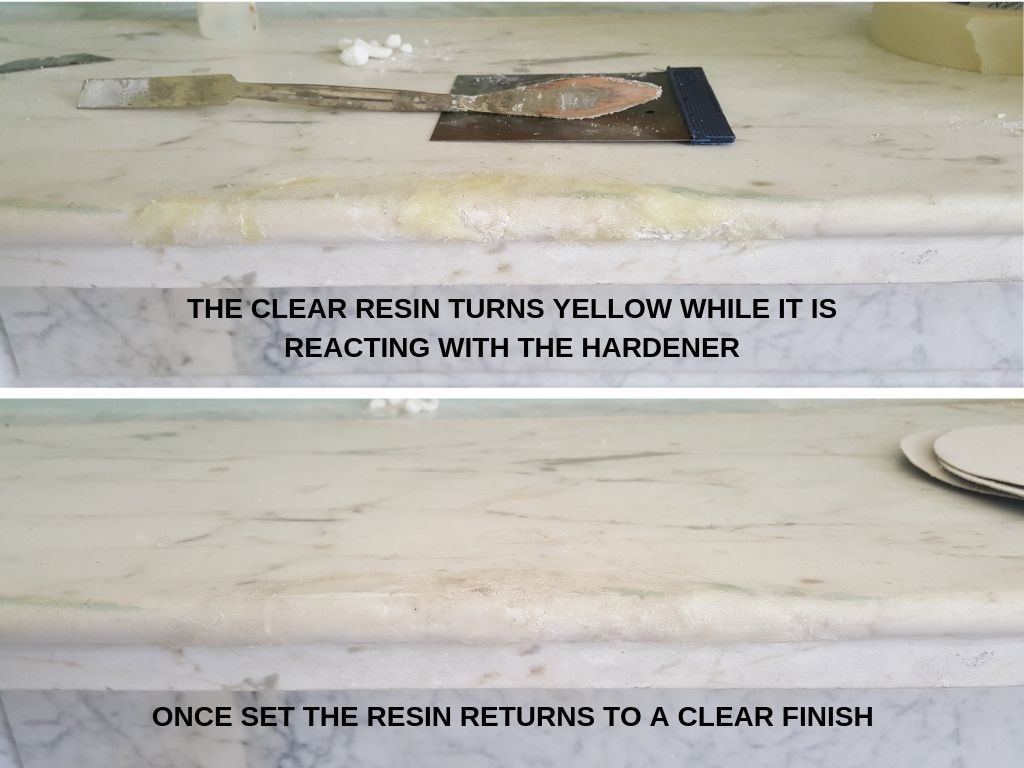
The clear resin and stone dust mixture was also used to cover the white resin that had been shaved back. The clear resin will take 24 hours or more to harden to a point where it can be worked on. While the clear resin is reacting with the hardener it turns a yellow colour. Once set it will return to a clear finish.
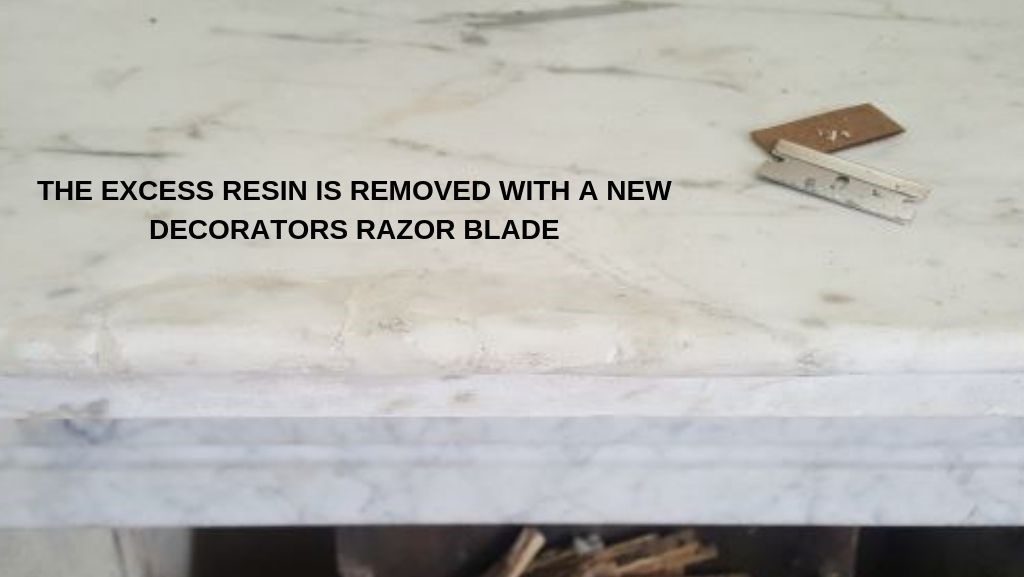
Once set the excess can now be carefully removed. To avoid cleaning or affecting the surrounding marble too much, the excess is removed with a decorator’s razor blade. As the excess is shaved off the newly repaired marble will look a little lighter in colour.
To blend it all in, it is a simple case of just rubbing a small amount of the soot into the marble. The resin at this point will look a little darker than the marble. To lighten the colour of the resin, I gently scrape the surface of the resin with the razor blade.
The process of rubbing soot into the marble and scraping the surface of the resin is repeated several times. After a few minutes, the repair will blend in with the rest of the marble. Normally I would seal the marble after repairing it. On this occasion, I decided not to seal it. I want to allow the repair to age naturally with the rest of the fireplace.