I have been cleaning and sealing stone floors for over 40 years and people often ask what the best way is to clean and seal a stone floor, which are the best cleaning products for stone floors and what stone sealers do you recommend.
This method is for cleaning and sealing a small natural stone floor without any special equipment, if you have a small galley kitchen, a small hallway or a bathroom with a natural stone floor this method is best for you. This is also for applying a surface seal (like a mat, satin or gloss finish seal) and not an impregnator as the process for this is a little different to the method outlined in this article.
PLEASE READ THIS FIRST
THIS METHOD IS NOT FOR POLISHED MARBLE, GRANITE OR LIMESTONE FLOORS, ALSO IF YOUR FLOOR HAS ANY GROUT MISSING FROM THE JOINTS OR THE TILES ARE DAMAGED OR CRACKED THIS METHOD IS NOT SUITABLE FOR YOU. THE METHOD OUTLINED IS FOR CLEANING A FLOOR NOT FOR STRIPPING OFF AN OLD SEAL OR POLISH TO DO THIS YOU WILL NEED SPECIALIST EQUIPTMENT AND STRONGER CHEMICALS AND IT IS BETTER TO HAVE A CONTRACTOR DO THIS TYPE OF WORK FOR YOU.
SELECTING A SEAL
If the floor has not been previously sealed or it has been a few years since it was treated, you should test your seal a few days or a week before you start. You can clean one or two tiles and test it on your own floor, or if you have a spare tile it is a good way to try a different finish. If you do not have one, most tile shops will sell you a single sample tile some of them may even give it to you if you are an old customer. I have found the large DIY stores will also sell you a single tile, if you find a damaged one, they will let you buy it at a low cost.
TESTING YOUR SEAL
Testing the seal on your floor or a similar tile will tell how many coats of the seal you will have to apply before you can achieve the look that you want. On some natural stones, the first coat will make little or no difference as most of the product will be absorbed into the stone. It is not until the second coat that you will have an idea of how the stone will look and if it will need a third coat or not. Testing the seal will also give you an idea of drying time, and when testing leave one coat to completely dry before applying a second coat. How the stone will look ten minutes after it has been sealed is completely different
YOU WILL NEED THE FOLLOWING ITEMS
Time: – Give yourself plenty of time, do not try to do it in a few hours or in a day, spread it over 2 or 3 days depending on how dirty the floor is, and they type of natural stone you have.
Cloth dust sheets: – 2 dust sheets or old bed sheets, these will have several uses for this project. You will use one to protect any flooring leading to the area to be cleaned and a second dust sheet to be folded in order to make a knee pad for yourself (If you are comfortable you will do a better job)
A flat mop: – These are available in most supermarkets and buy plenty of spare mop heads 4 or 6 (To save money you can also use some old towels or old microfiber cloths)
Cleaning Agent: – I use Lithoifin and HG products for natural stone. The products from these two companies are specially formulated for natural stone and will not harm the stone if used properly. Always read the label first or contact a stone supplier for advice if you are not sure.
Avoid any products that contain acids, bleach or lemon and, never use toilet cleaners or limescale removers and do not use anything containing a caustic or an abrasive in them.
A Soft bristle brush or broom and a small hand brush
Rubber Gloves
Spare microfiber cloths
A small plastic bucket or jug
A litre of Natural Stone sealer of your choice
A paint roller & tray with either a short pile roller or a sponge roller
TIME AND PREPARE YOURSELF
You are going to spend between two thirds or three
PREPARE THE AREA
Before we start, I will assume you have swept or vacuumed the floor and you will have protected any other floor areas with one of your ground sheets and you have your rubber gloves on.
CLEANING THE FLOOR
Mix a small amount of cleaning agent in your bucket or jug using just the water from your hot water tap only mix enough to clean a 1 or 2 square metre area. Carefully pour some of the solution onto the first area, it should be enough to wet the area but do not flood it. Using your soft broom keep moving your solution around do not allow it to dry add a little more solution if needed.
CLEAN THE GROUT
While the area is still wet using your folded dust sheet kneel and scrub the dirt out of the grout joints before the solution dries. Keep moving your solution around for about another half a minute making sure no sections can dry, once the water cools the solution it is not as effective.
DRY THE FLOOR
While it is still wet dry the area with one of your flat mops or microfibre cloths. Put these away to be cleaned later, never use them more than once for this project.
RINSE WITH CLEAN WATER AND DRY
You have removed the dirty solution from the floor, now wet the floor again with just hot water using a clean mop head or cloth and dry the floor again with a clean cloth or mop. If your cloth is dirty when you have dried the floor repeat the process again with just hot water, using clean mop heads or cloths each time. Once you are satisfied this area is clean move onto the next area.
REPEAT THE PROCESS
Repeat the process with a clean mix of your solution and hot water or add to the original mix if you have any left. Always use clean mop heads or cloths each time. By using this method with a clean solution mix, clean hot water and clean mop head etc at every stage you will not transfer dirt from one section of your floor to the next.
SPECIAL EFFORT
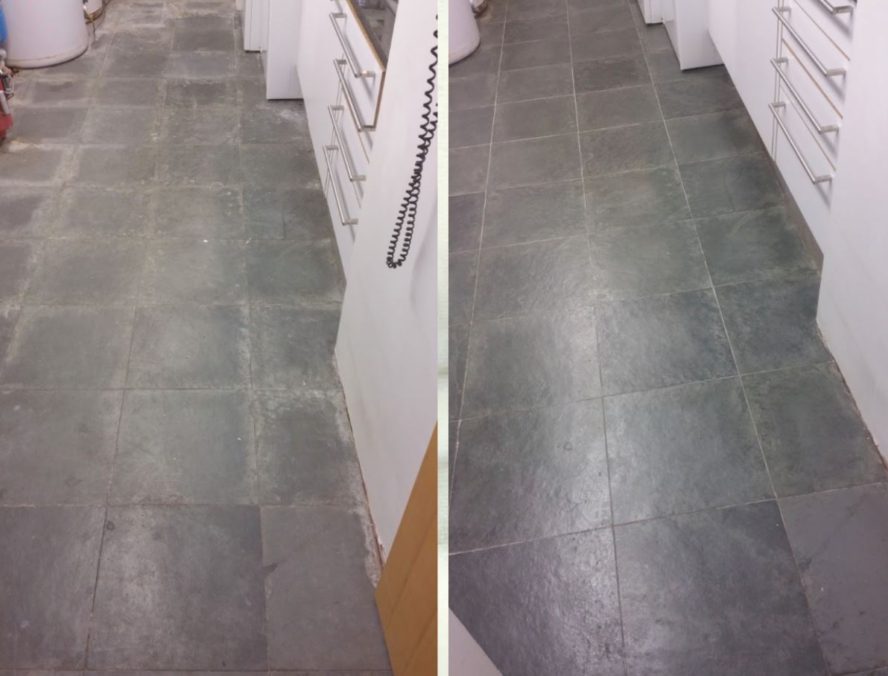
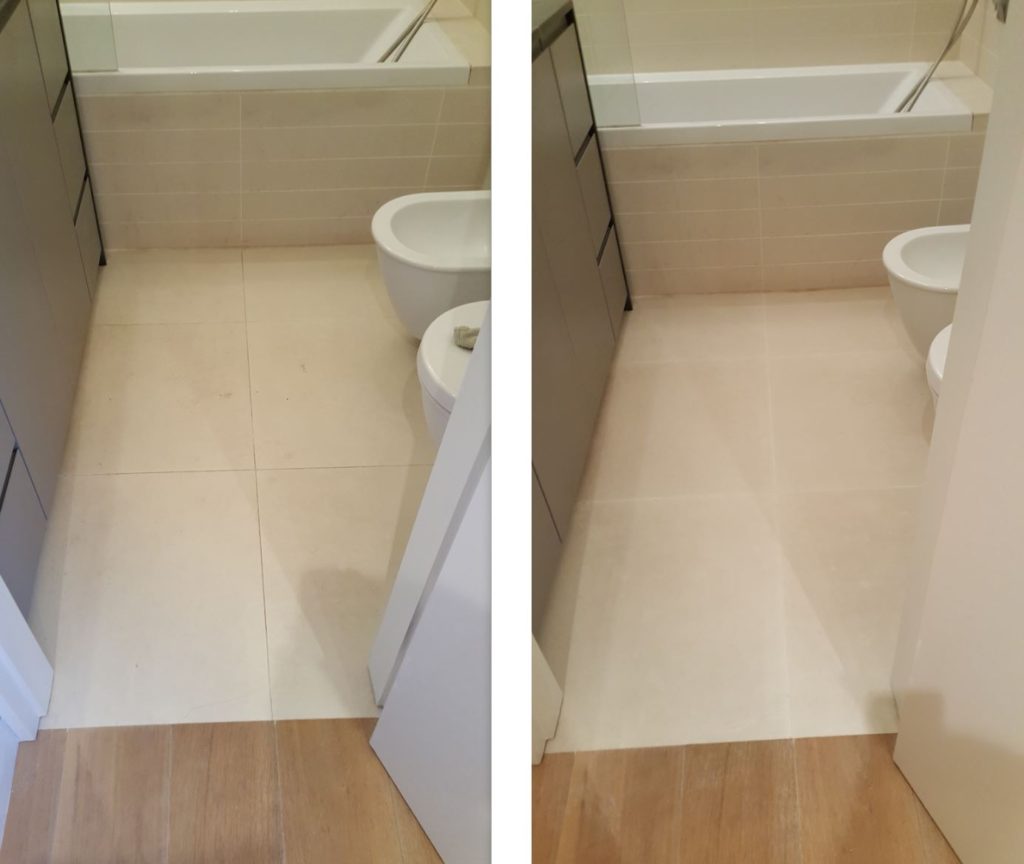
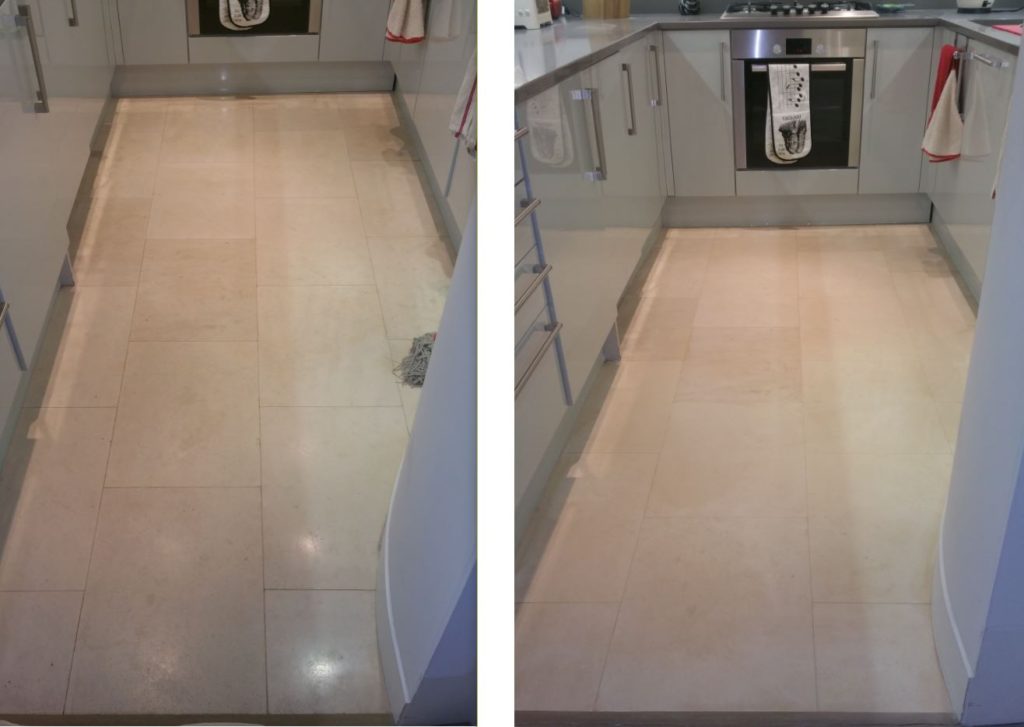
You should make a special effort to clean the grout while cleaning the floor. Clean grout will make a dramatic difference to the finish and in some cases when cleaned properly it will look like a newly laid floor.
STAINS
After you have cleaned the floor you may have some deep stains. These stains may have been there for some time and you have just cleaned off the dirt that was covering them. If you have lived in the property for a few years you may know what they are or what caused them. Removing some of the stains can just be as simple as using a stronger mix of your cleaning solution. If it is a paint stain white spirit and a small stiff brush works well. For oil and rust stains Lithofin and HG have products for removing these types of stains.
Now that your floor is clean all the cloths and mop heads can be washed and dried for later use and you have no wasted materials.
DRYING TIME
You would have used more water to clean your floor than normal, so it will need a few hours to dry. Leave it for as long as you can 12 to 24 hours is good. If your floor is in the kitchen or bathroom you will still to use these rooms so cover the floor with your dust sheet. Use a dust sheet without a plastic backing this will allow the stone to breathe and dry out. If your stone floor is in the hallway use an old towel in front of the door and
THE SEAL
I will assume you have decided on which seal or type of seal you want to apply to your natural stone floor if you have tested it on a spare tile you will know what to expect and how many coats to apply to achieve the look that you want. If you are still unsure contact a local supplier or the company that supplied and fitted the tiles if you know who they are for some advice.
PREPARATION
Read the instructions on the container before you start even if it is a product that was given to you by the contractors that laid the floor for you or even if you have used it before. I read them every time I do a job. Make sure you have everything you need ready and finally sweep or vacuum the floor, you will be amazed how much dust particles and hair etc that will settle on a floor in just a few hours.
VENTILATION
Open a couple of windows in your property for ventilation, opening 2 windows, one at either end of your home will allow the air to flow through your property. This is very important if you going to use a spirit-based seal. Water
CHOOSING THE TYPE OF ROLLER
Which type of roller is best? If I am sealing honed marble or limestone floor, I use the short pile roller. If I am sealing a riven slate floor, I use the little sponge roller as this allows me to work the product into the crevices and little undulations in the tile.
APPLYING THE SEAL
We will be working in one square metre areas or smaller as before, make sure you have your dust sheet folded into a knee pad as before. If you are comfortable you will do a better job. We will be applying 2 or 3 thin coats of our chosen seal.
Pour a small amount of the product into the paint tray and wet your roller, do not saturate it and remove any excess. When you apply the seal, you should not see the product spray, splash or run as you apply it.
THE FIRST COAT
Apply an even coat over every inch of the stone, working it back and forth into the stone, until it is fully absorbed into the stone.
Natural stone will absorb the seal quicker in some areas than it does in others, even on the same tile one half may absorb all the seal and next to it the seal will sit on the surface. You will notice when this happens so move your roller over the area where the seal is sitting on the surface and work the seal into the areas that have absorbed all the seal. Only add more seal as you notice the roller is drying out and makes no difference as you work the product into the stone.
THE STONE WILLL ABSORB MOST OF THE FIRST COAT
Do not worry if you do not see a big difference in the look of the stone. Your goal at this point is to just apply a thin even coat to the stone. Once you are sure you have covered the whole area move on to the next area, working in one square metre areas until completed. The first coat dries quite quickly as most of the product is absorbed into the stone.
FIRST COAT, TOUCH DRY
This will just take an hour or two as it is a small area. Once it is touch dry, we can apply the second coat. As before get comfortable, wet your roller with the seal but do not overload it. As you apply the seal to the surface you will notice more of it sits on the surface, if you see tiny little bubbles forming work the roller back and forth spreading it thinner across the stone until they vanish leaving a smooth finish you should notice that you use less seal and it spreads easier.
RIVEN OR TEXTURED FINISH STONES
In the case of riven stones wait for a minute or two before you move onto the next section. If you notice little pools forming as the seal runs through the crevices. When this happens dry your roller in the tray and remove the excess with the roller or spread it thinner. I always keep a spare dry roller for this purpose when sealing a riven tiled floor. Do not leave it too long before removing these little pools as once the seal starts to dry and set the roller will stick to the seal and it will affect the overall finish.
NO MORE THAN TWO COATS
Never apply more than two coats of seal in one day, if you feel it needs a third coat, leave it for another 24 hours before doing so. The other thing to consider is how the stone looks ten to twenty minutes after it has been sealed is different from how it will look after 24 hours.
WALKING ON THE FLOOR
The floor should dry in a few hours to test it just touch it lightly with the palm of your hand if it feels tacky leave it for another hour or so. When you need to use the area at first touch it to see which parts are still wet or tacky and walk on it wearing a clean pair of socks try not to walk on it while wearing shoes for at least 24 hours.
REPLACING FURNITURE
If you have any items to put out on the floor like a dustbin or a toilet brush or an umbrella stand in the hallway leave it off the floor for about 36 to 48 hours. The seal may be dry to the touch, but it will not be fully cured, and these items may stick to the seal or floor.
MARKS AND SPILLAGES
If you have a spillage in the first few hours just blot the area with a dry cloth do not wipe or rub the area, it may not have affected the seal. If it has simply ap
You should now have a nice clean and sealed floor to enjoy for many years if you need any advice before you start please feel free to contact me. This article is for cleaning and sealing a small area if you have a larger area just allow more time and do not try to do too much in one go or you can contact me for a quotation to do the work for you.